

Preface
This tutorial introduces the Five Shots of Visual Storytelling—a framework we actively teach at DPC to help photographers tell clearer, more intentional stories with their images. Whether you’re using a mobile phone or a mirrorless camera, this structure brings variety, rhythm, and emotional impact to your photography. We also explain the Five Shots of Storytelling in our Mobile Photography Course.
The content is based on my own teaching notes and visuals developed with the help of AI tools—for image creation, prompt refinement, and proofreading. The goal was to create something immersive, practical, and easy to follow.
This guide also sets the stage for something new. In this coming month, I’ll be releasing a two-part series exclusively for our Pro Members, focused on how to use AI tools for storyboarding, composites, and editing to enhance your visual storytelling workflow. If you’re a Pro Member, it’s something to watch out for. If you’re not, I still hope this tutorial gives you real value and gets you thinking differently about your next photo story.
***
Introduction to the Five Shots of Storytelling
For many years I have taught the simple Five Shots of Storytelling framework to elevate creative and visual storytelling. This approach is especially effective for mobile phone photography classes – after all, your phone is the camera you always have with you! The idea is straightforward: when telling a story with photos, deliberately capture five key types of shots to cover all angles of the story. These five shots are the:
- Wide, or Establishing Shot,
- Medium, or Environmental Shot
- Portrait, or Subject Shot,
- Detail, or Close-Up Shot,
- Action, or Emotive Shot.
Together, these shots ensure your photo story includes context, character, detail, and emotion. I encourage my students to practise this framework no matter what camera they are using, focusing on storytelling rather than fancy gear. The best camera is the one you have with you and using it intentionally with these shot types will dramatically improve your visual narratives.
Tip: My recommended workflow is to start with the widest shot and progressively move closer. “Start wide and show the whole story, and then work in close. Towards the end, swap lenses (or modes) and focus on the details,” I advise. Capture the big picture first, then the medium and portrait shots, and finally the close
What are the Five Shots of Storytelling?
The Five Shots of Storytelling is a framework we use at DPC to help photographers create more compelling visual narratives. It guides you to systematically include five distinct shot types, ensuring variety and structure in your storytelling. Whether you’re shooting with a DSLR or a smartphone, the framework is highly adaptable across genres—from personal to commercial photography—making it accessible to everyone. Each shot serves a specific purpose, adding context, character, emotion, detail, or energy to your story. It also helps break the habit of relying on just one type of shot, encouraging versatility for assignments, projects, and events.
While the Five Shots framework is highly effective, it’s not exhaustive. In the world of video and film, professionals like cinematographers and screenwriters often work with a far broader range of shot types, carefully planned and pinned down in storyboards and scripts. This guide is not meant to be definitive, but rather a simplified, intelligent system for developing visual storytelling instincts. I cover more advanced frameworks in my Creative Visual Storytelling series and in our dedicated video classes, where we use cinematography as our main medium. For still photographers, content creators, and aspiring filmmakers, this is a powerful starting point to sharpen narrative thinking and create engaging visual stories.
Flexibility Within the Framework
Although the Five Shots of Storytelling provides a clear structure, not every image will fit neatly into a single category. A wide shot zoomed in slightly becomes a medium shot. A medium shot can easily shift into a portrait, depending on how tightly it’s framed. The lines between categories often blur—and that’s perfectly fine. In fact, as you start combining the five shot types with variations in angle, composition, or moment, you’ll find the framework naturally expands—five shots can easily become ten, twelve, or more. That’s part of the creative process. The goal isn’t to tick rigid boxes, but to build a rich and varied narrative. If you’re unsure exactly which type a shot falls into, don’t get stuck on definitions. If it works visually and serves the story, that’s what matters. Use the framework as a guide, not a constraint.
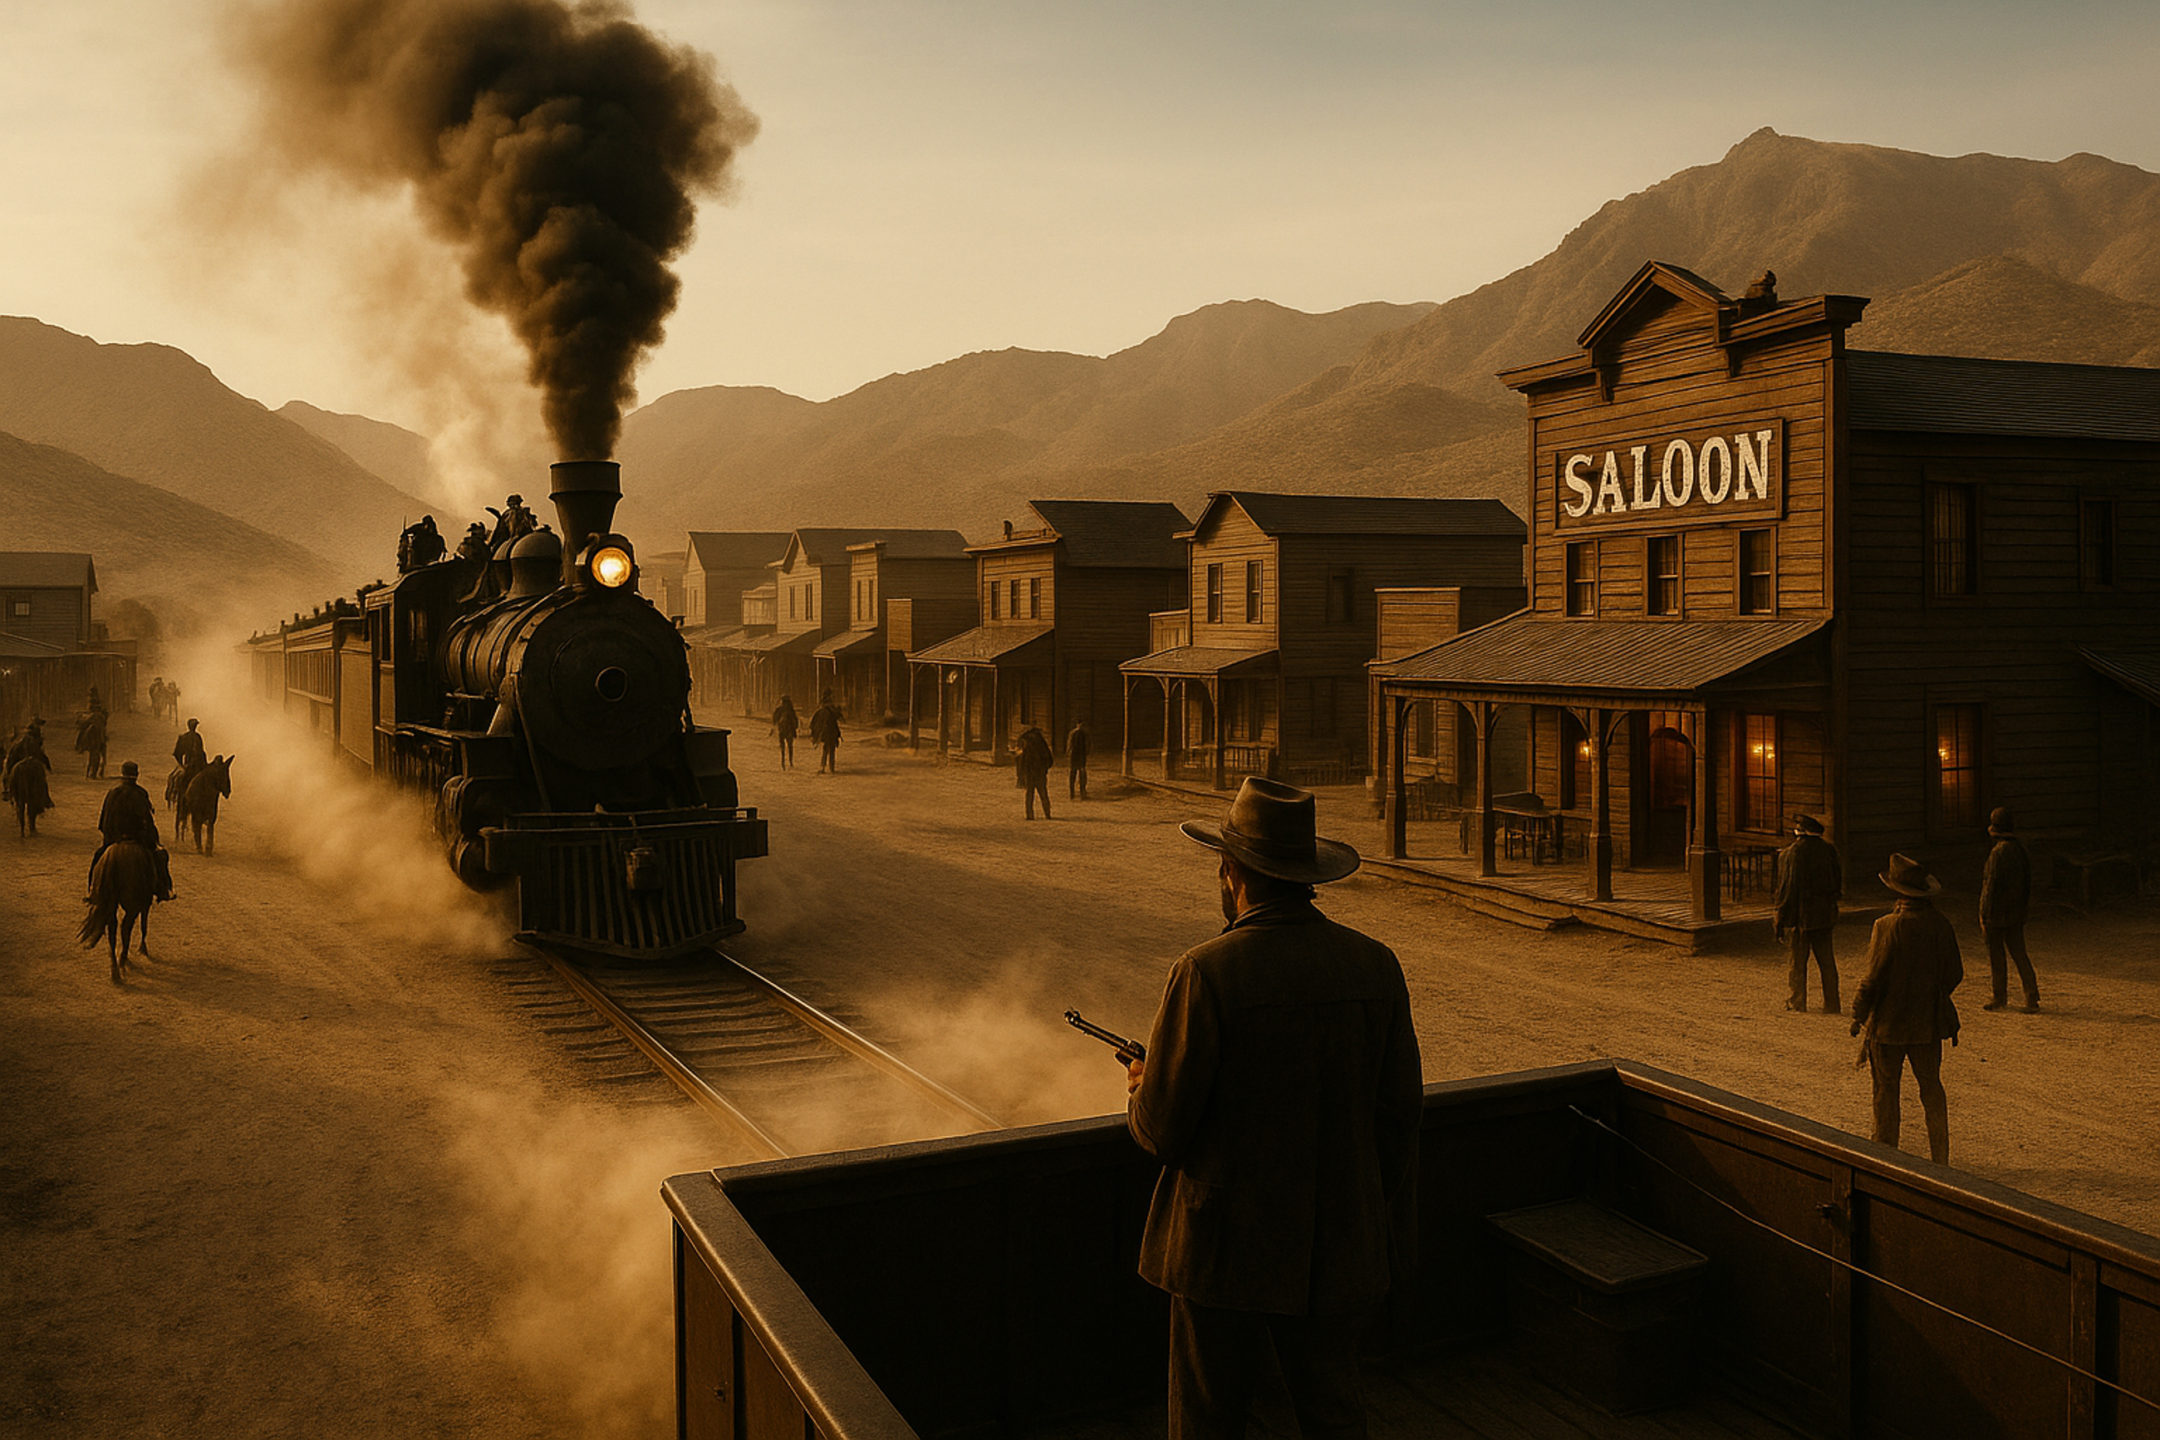
1. The Wide / Establishing Shot
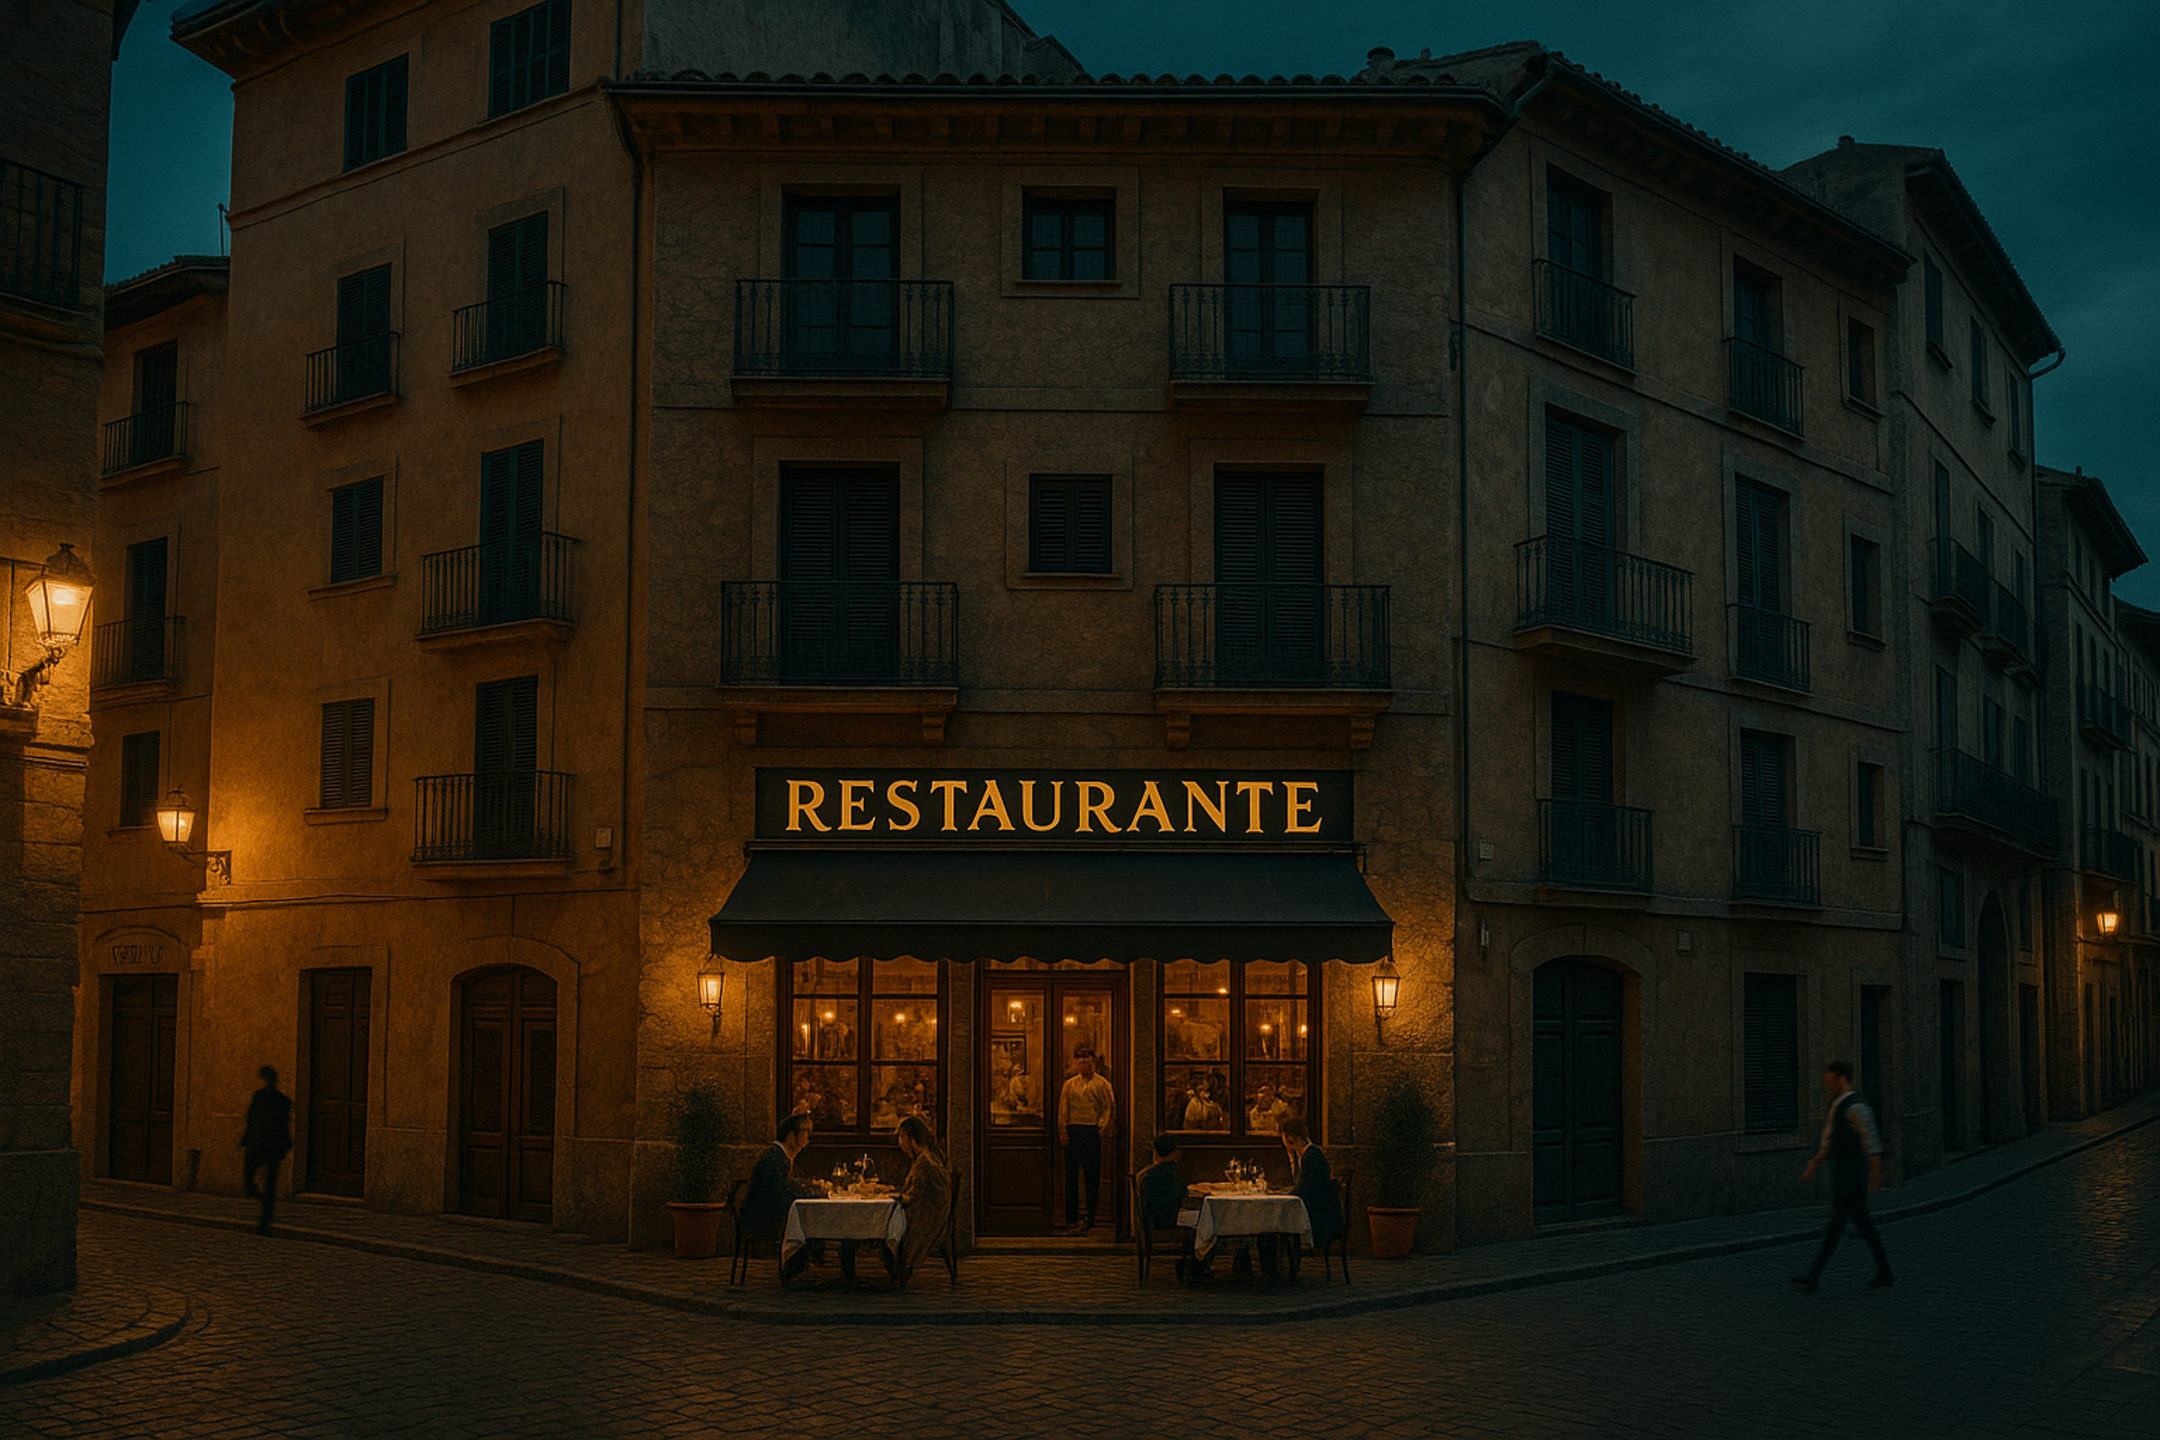
The wide shot, also known as the establishing shot, is a broad image that captures the full scene or environment where your story takes place. It often involves using a wide-angle lens or stepping back to “show it all.” This shot answers the questions: Where are we? What does the setting look like? It places your audience right into the story’s setting.
The wide shot sets the stage for your visual story by providing context and atmosphere. It establishes the tone—whether it’s a vast landscape, a bustling city street, or a quiet interior—and gives viewers a sense of scale and mood before you zoom into finer details.
Techniques for the Wide / Establishing Shot
- Choose an ultra-wide or wide-angle lens (e.g., 15–35mm on a full frame camera, or smartphone ultra-wide mode) to clearly capture the entire environment and establish context.
- Seek elevated or expansive vantage points, such as hills, balconies, or drones, to effectively convey the scale and layout of the scene.
- Maximise depth of field by selecting a smaller aperture (around f/8–f/16) to ensure foreground and background elements remain sharply focused.
- Use leading lines, such as roads, fences, or rivers, to guide the viewer’s eye through the scene and enhance compositional flow.
- Capture atmospheric elements like fog, golden-hour lighting, dramatic skies, or unique weather conditions to set the mood and deepen narrative impact.
- Include subtle human presence, such as small figures or distant activities, to suggest scale and life without detracting from the primary focus on the environment.
- Clearly separate foreground, midground, and background layers to give a strong sense of depth and dimension within your wide scene.
How It Differs from Other Shots
Unlike closer shots, the wide shot doesn’t focus on individual subjects (even if people are visible, they’re typically small in the frame). It’s less about who and more about where. Without this shot, viewers might struggle to understand the setting or scale. By starting wide, you anchor your narrative in a specific place and time, providing context that the other shots build upon.
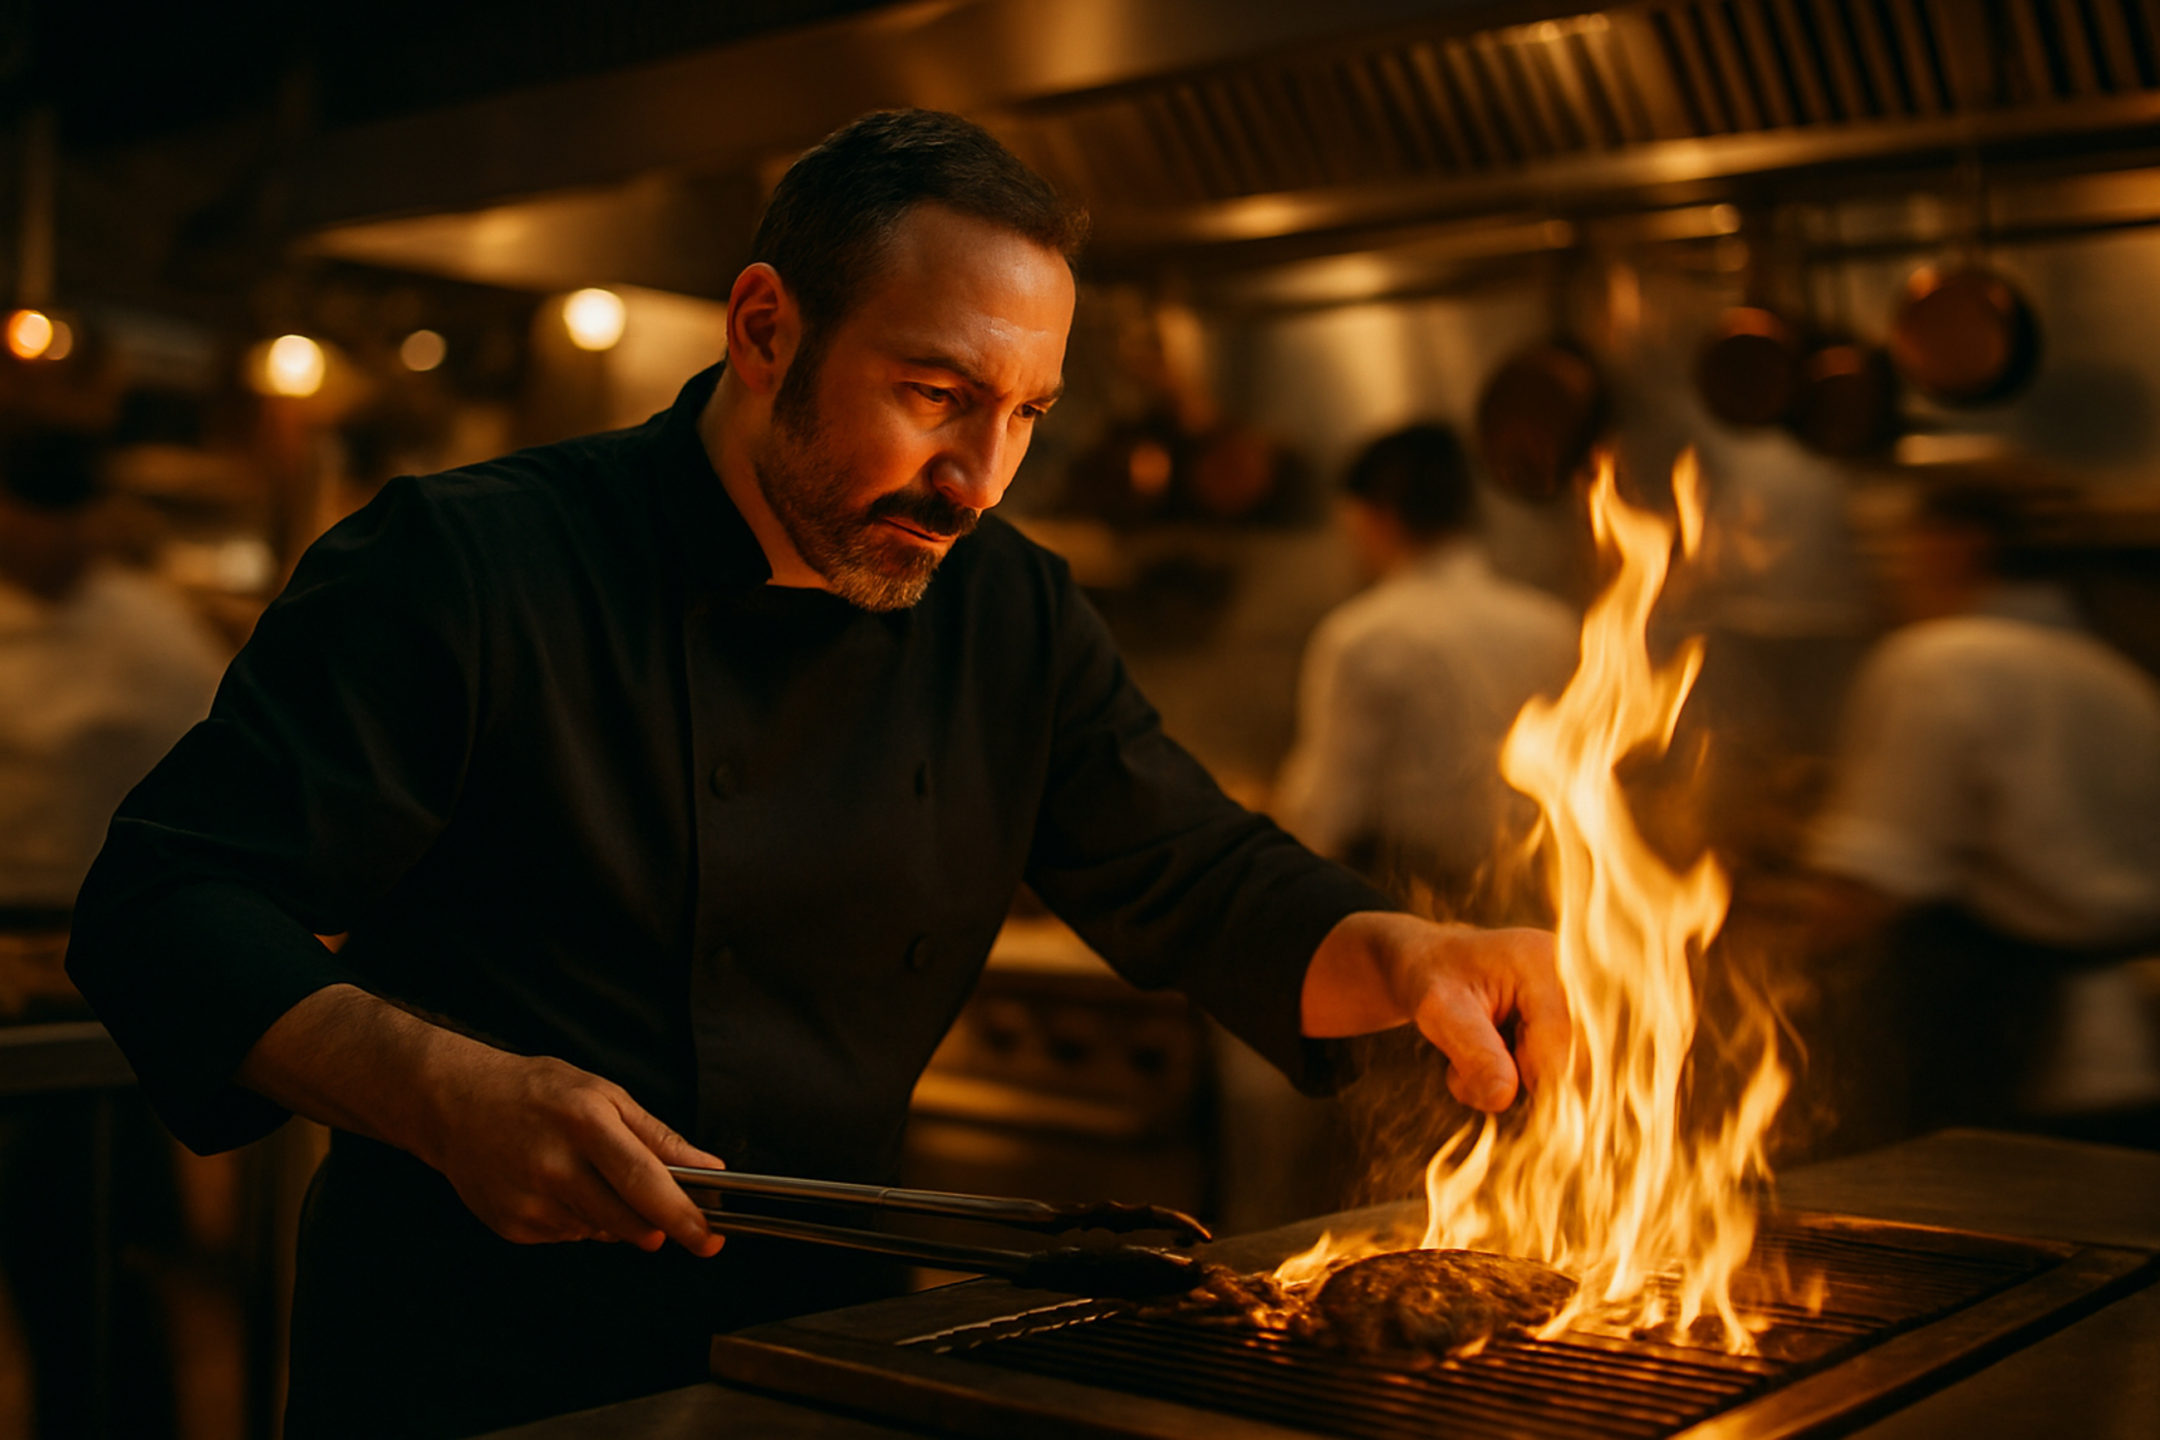
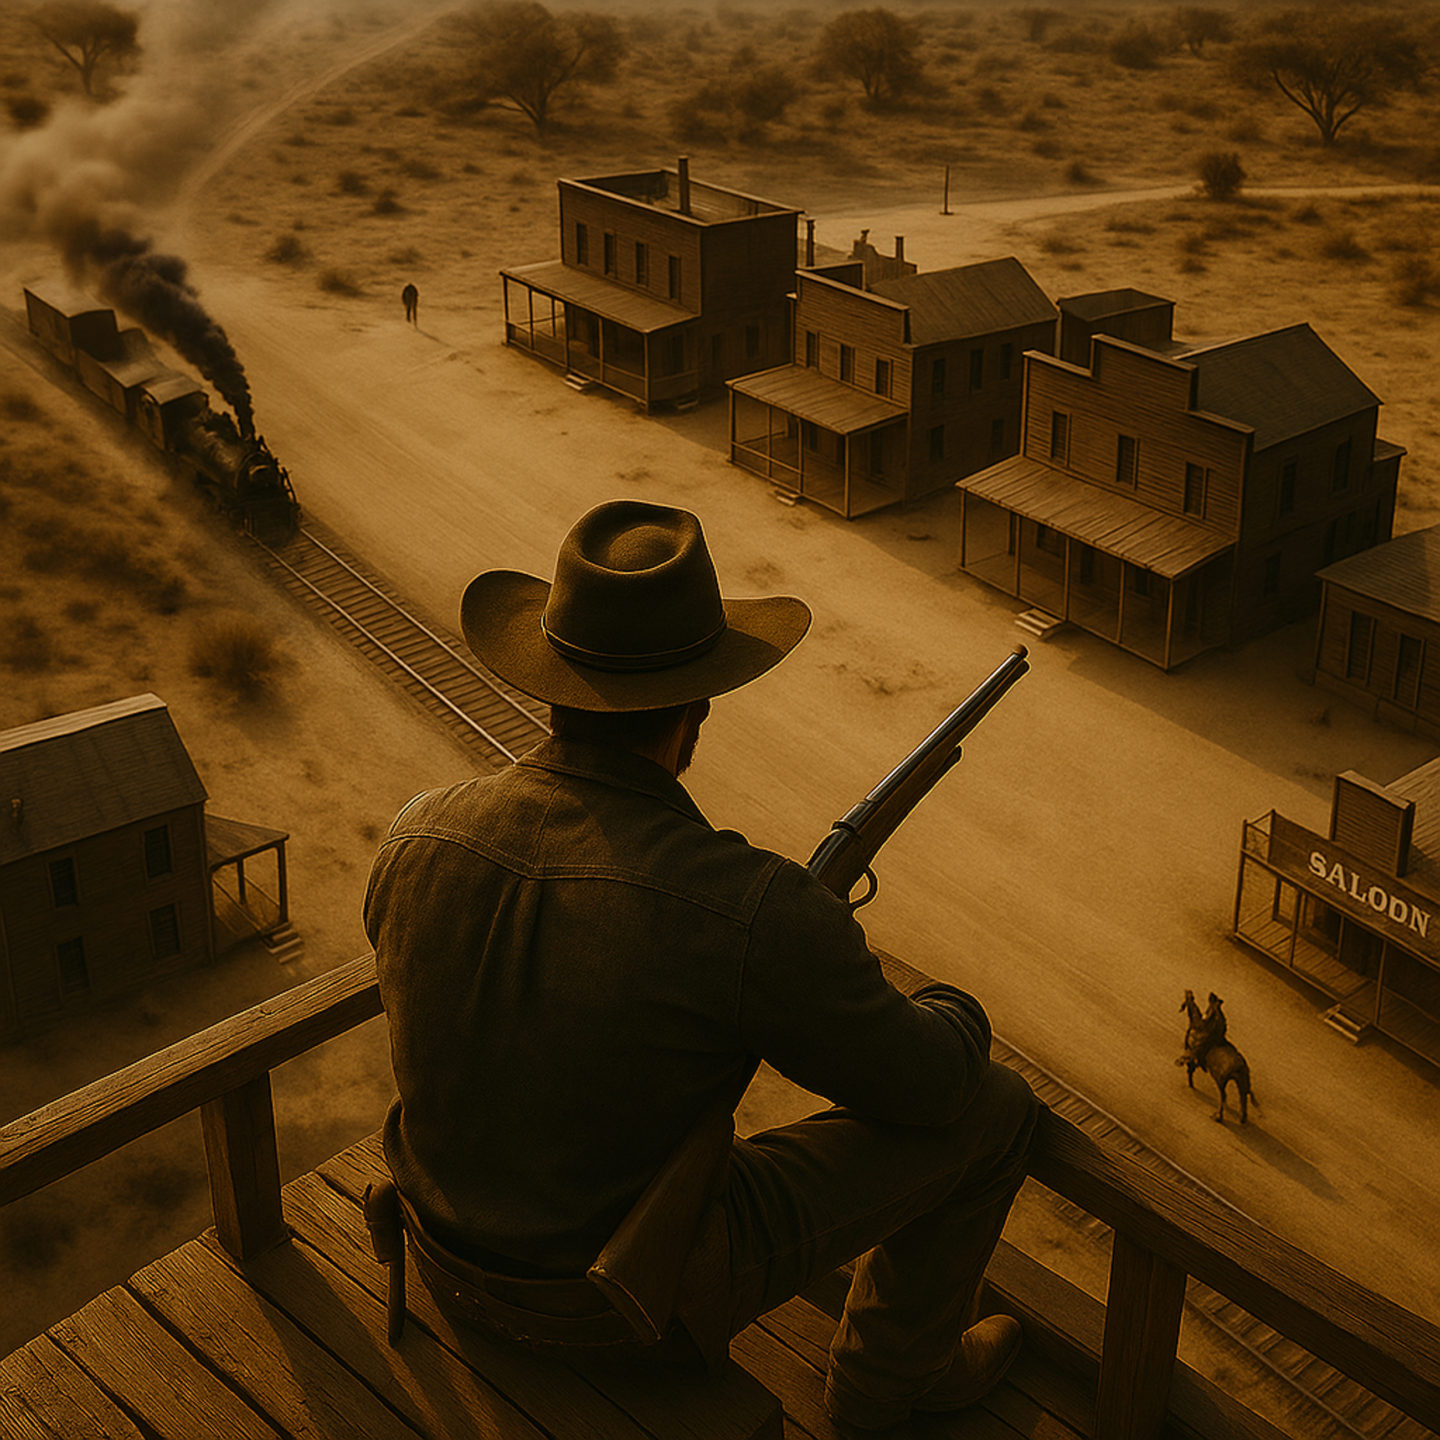
2. The Medium Shot / Environmental Portrait
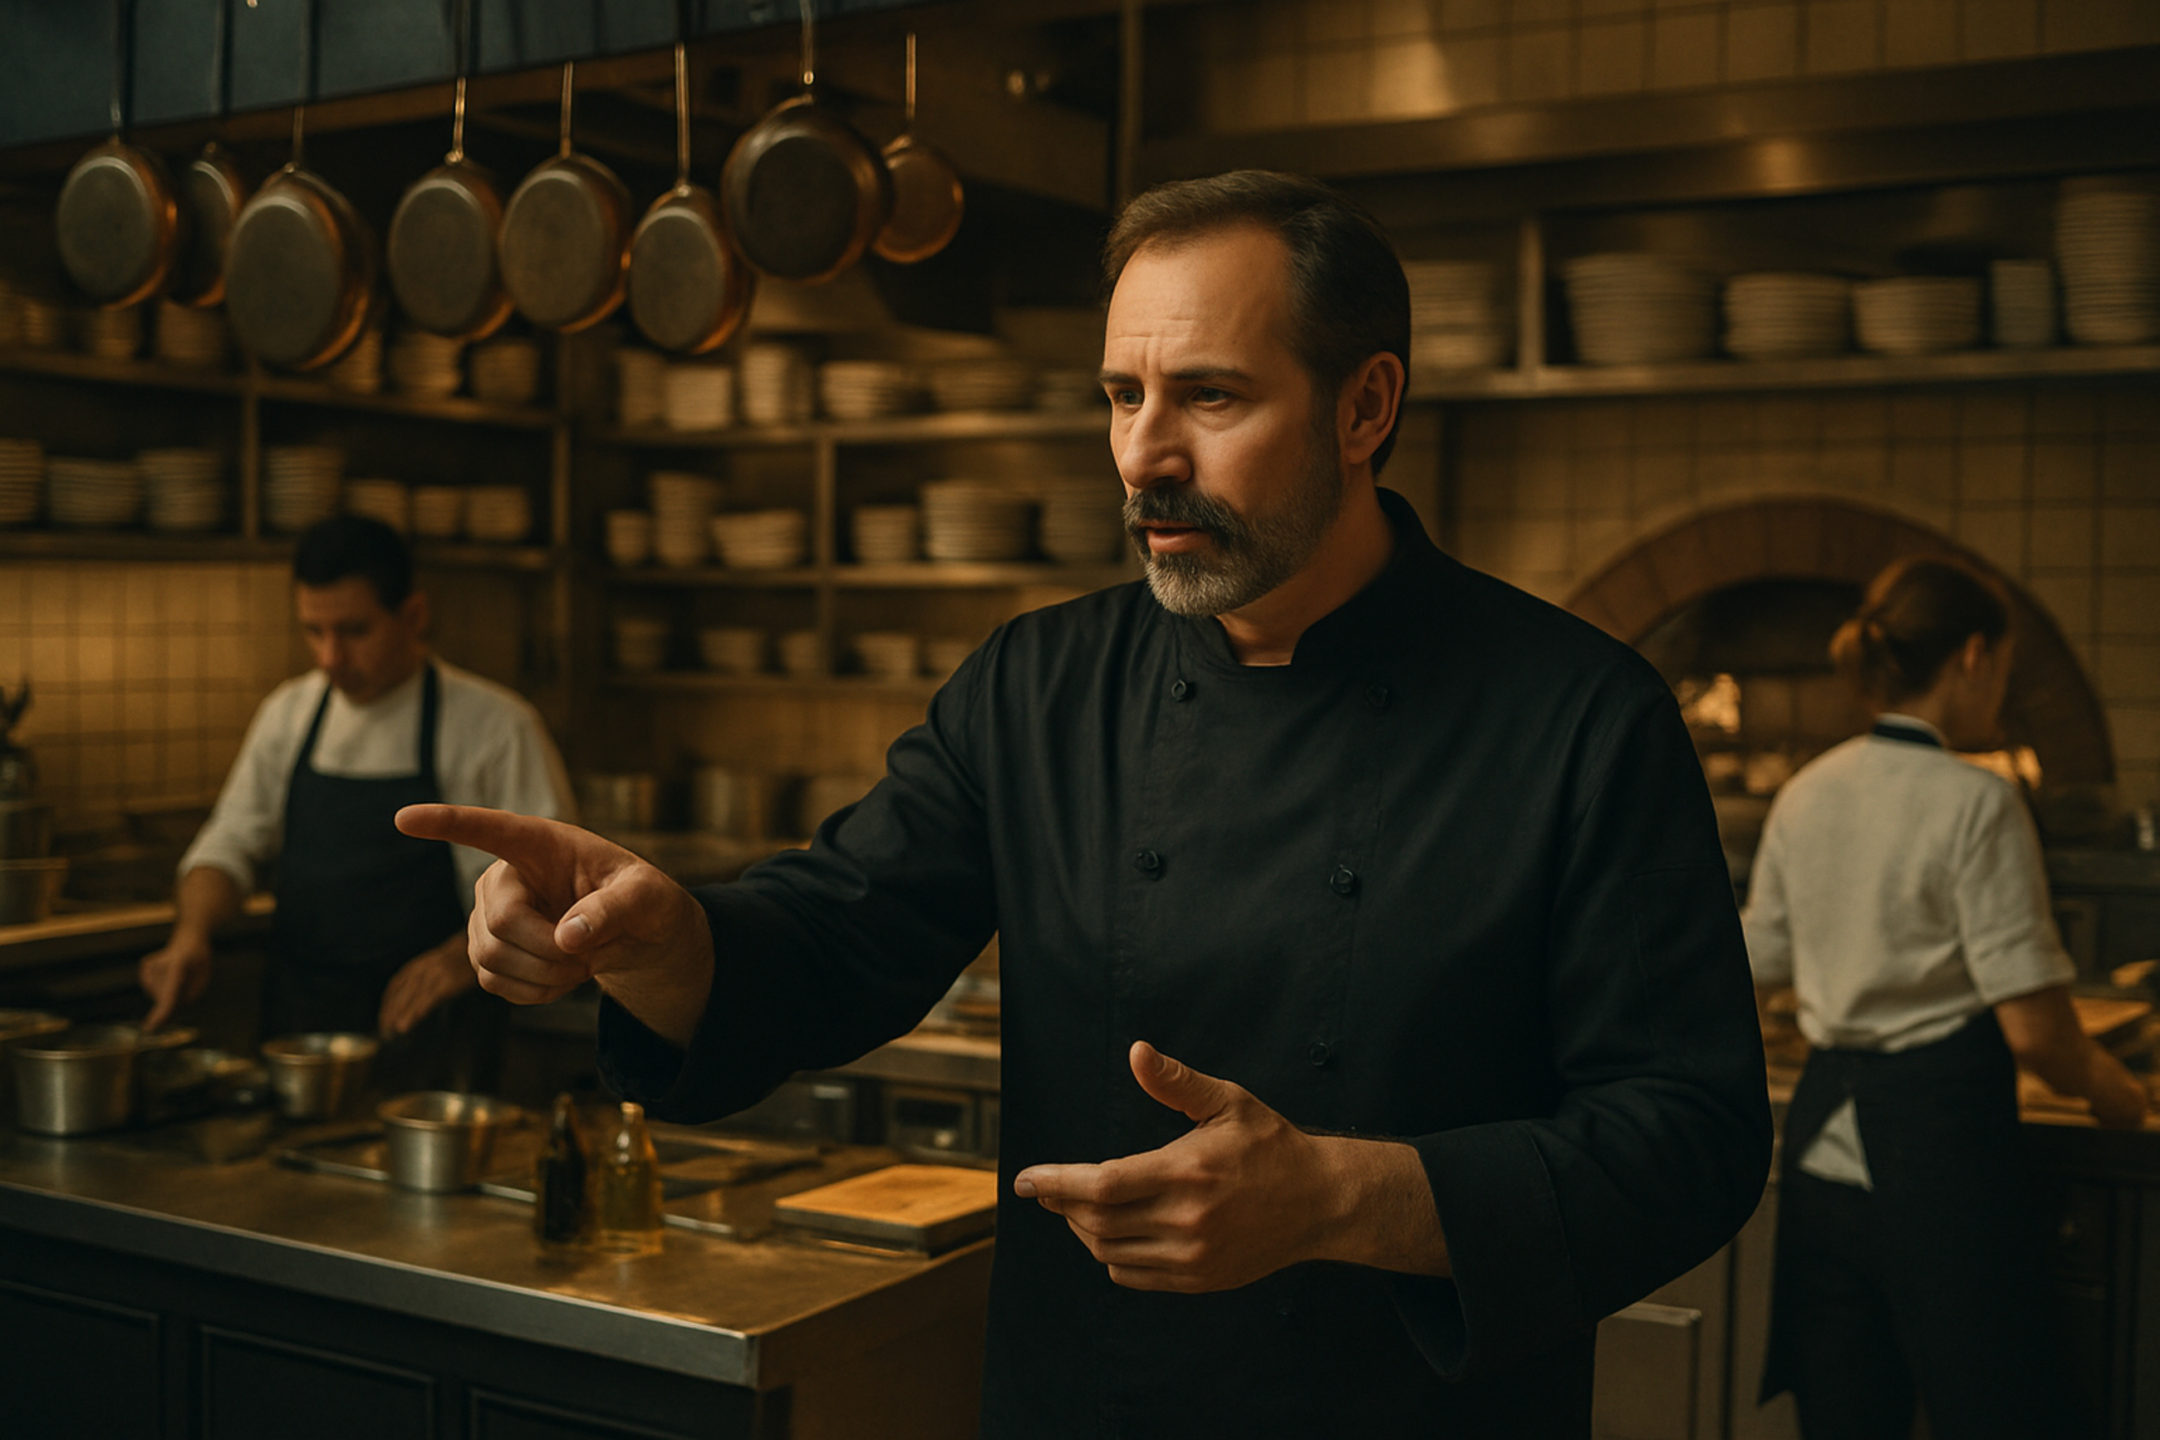
The medium shot (sometimes called an environmental portrait or mid-range shot) brings the viewer closer to the action, focusing on a specific area or subject within the larger scene. It typically frames a full person or from the waist-up or a key grouping of elements, balancing the subject and their immediate surroundings. This shot narrows the field of view from the wide shot and starts to highlight the core of the story.
The medium shot’s purpose is to introduce the subject(s) in context. It connects the people or primary subject of your story with the environment shown in the wide shot. In storytelling terms, you’re now telling the viewer, “Here is what we should pay attention to within that big scene.” It’s often used to show a person within their environment – hence “environmental portrait.” This gives a sense of what the subject is doing or how they fit into the scene. The medium shot adds more narrative focus: the viewer can start identifying the main characters or focal points and see their relationship with the surroundings.
Techniques for the Medium / Environmental Portrait Shot
- Frame subjects from the waist up or full length, including enough environment to show context.
- Use a medium aperture (around f/5.6–f/8) to keep the subject sharp while maintaining background details.
- Position your subject naturally within their setting—like a chef at their counter or a farmer in their field.
- Include relevant props or objects (tools, products, signage) that reinforce the subject’s identity.
- Use directional natural lighting from a window or open sky to illuminate the subject’s face while keeping the environment visible.
- Capture meaningful interactions between the subject and their surroundings, such as gestures or activities.
- Ensure background elements complement rather than distract, framing carefully to avoid visual clutter.
How It Differs from the Wide Shot
Unlike the wide shot, which is all-encompassing, the medium shot zeroes in on the heart of the story. It differs by excluding much of the irrelevant surroundings and homing in on the where exactly or with whom the main action is happening. Compared to a tight portrait, it still preserves environment – but it’s selective environment. What the medium shot adds that the wide doesn’t is focus and direction. It tells viewers, “Look here, this is where the story is happening within that particular scene.” It also sets up for a more personal connection than the distant wide shot yet still maintains context, so the viewer understands the setting. Essentially, it serves as a transition from the impersonal overview to the personal story elements, ensuring the story flows logically!
3. The Portrait / Subject Shot
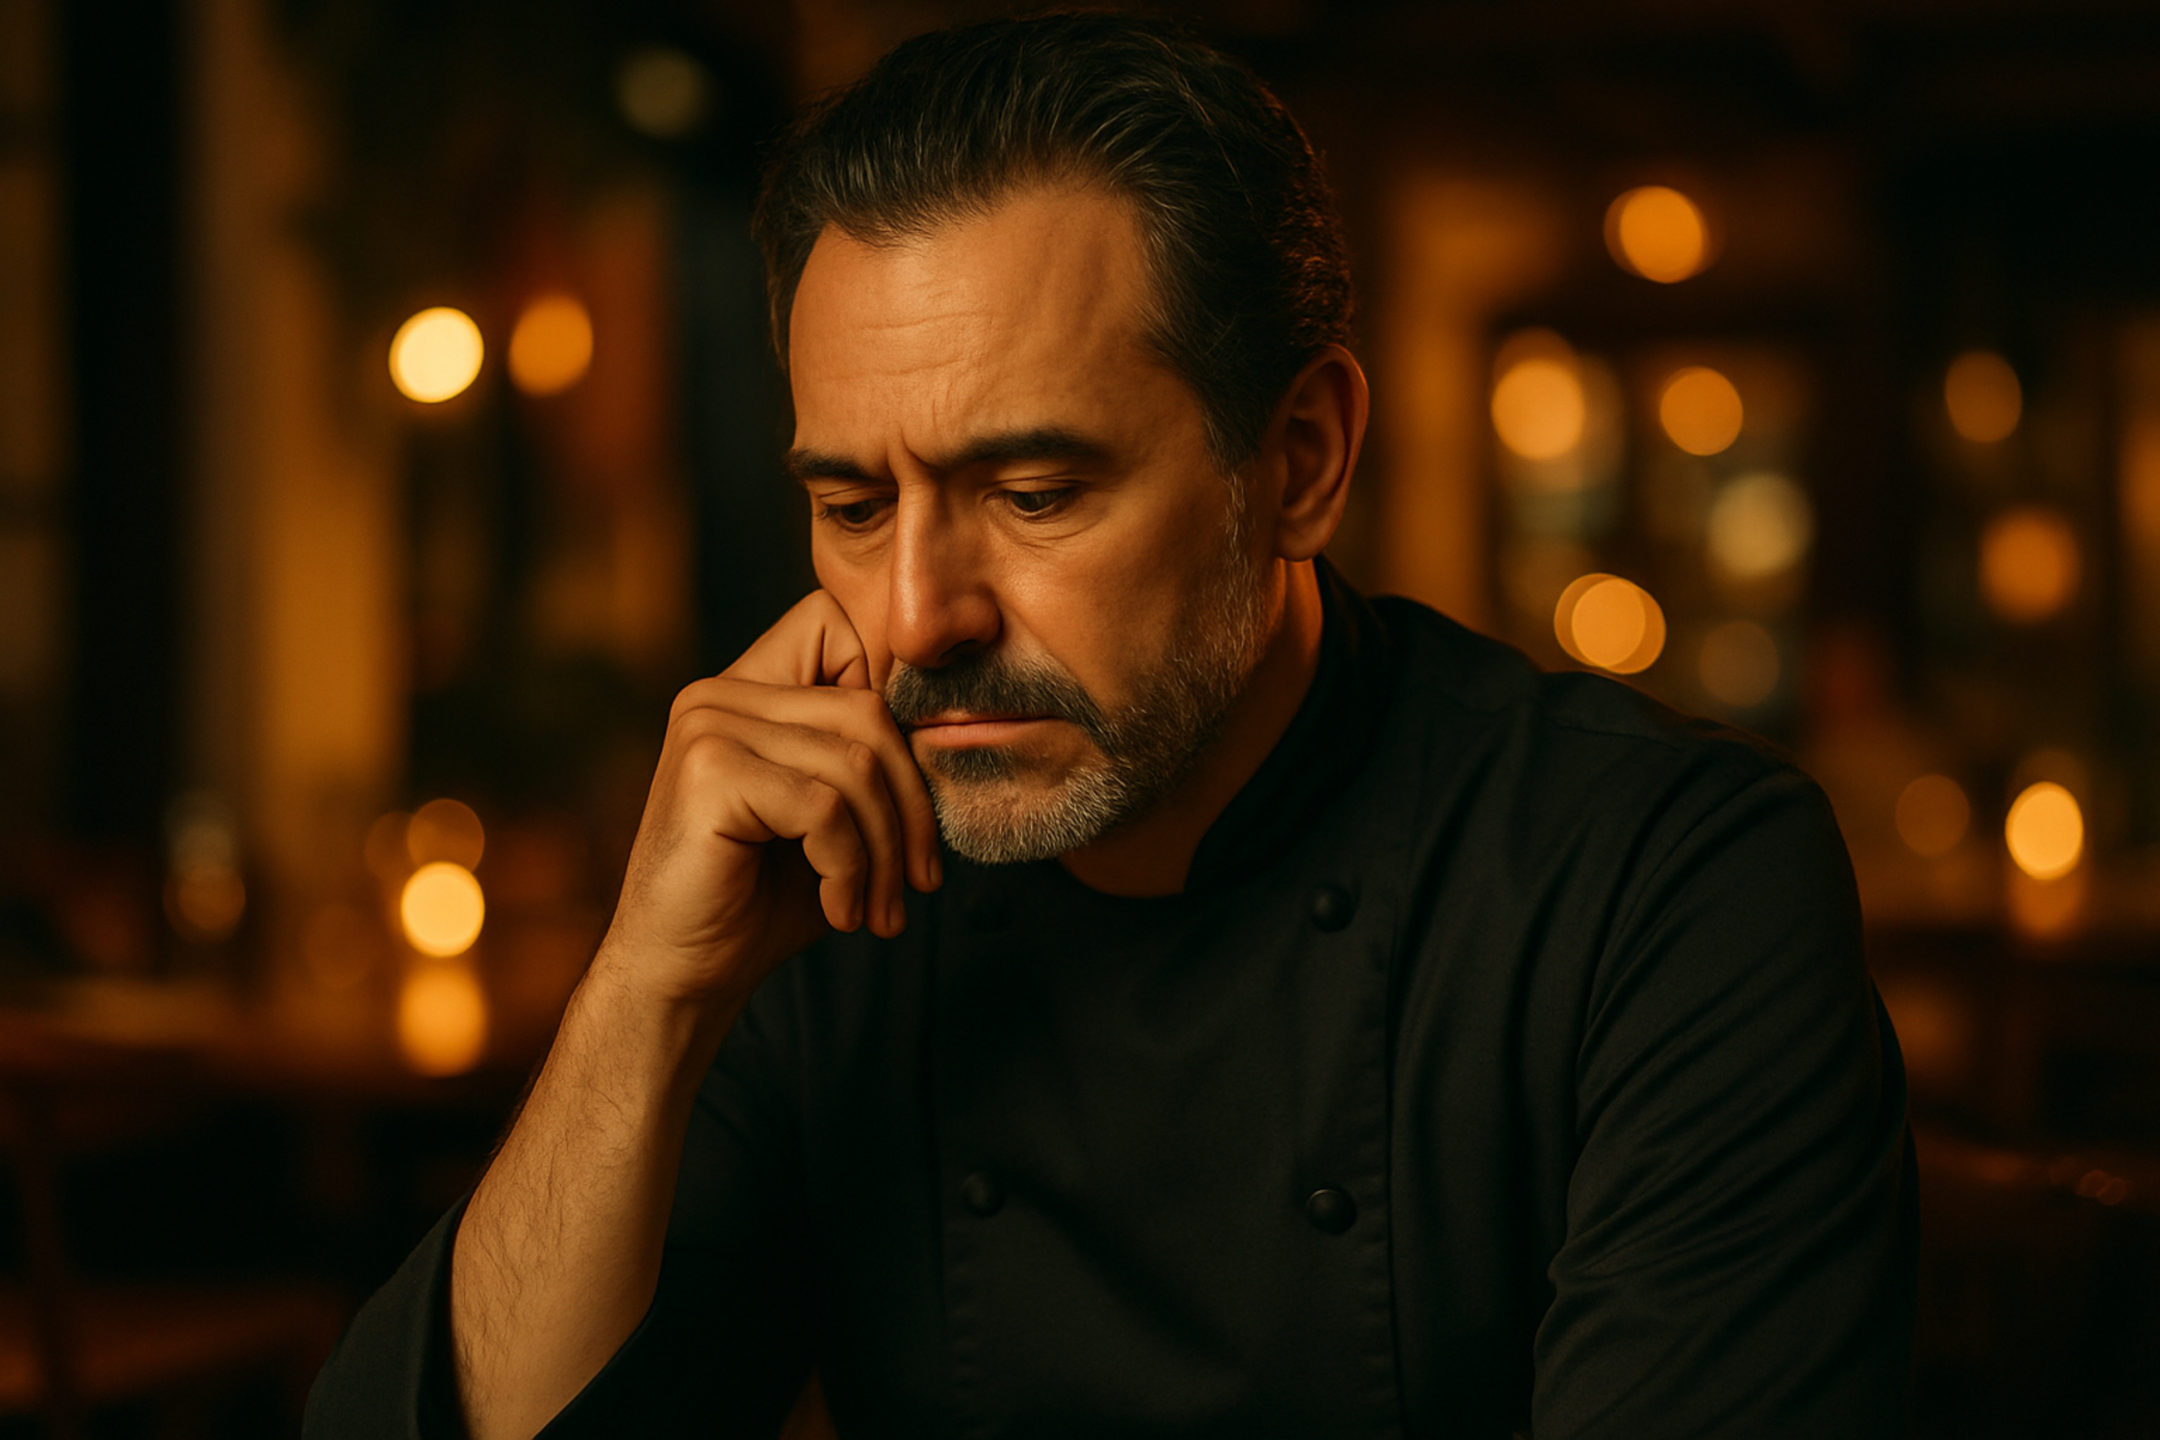
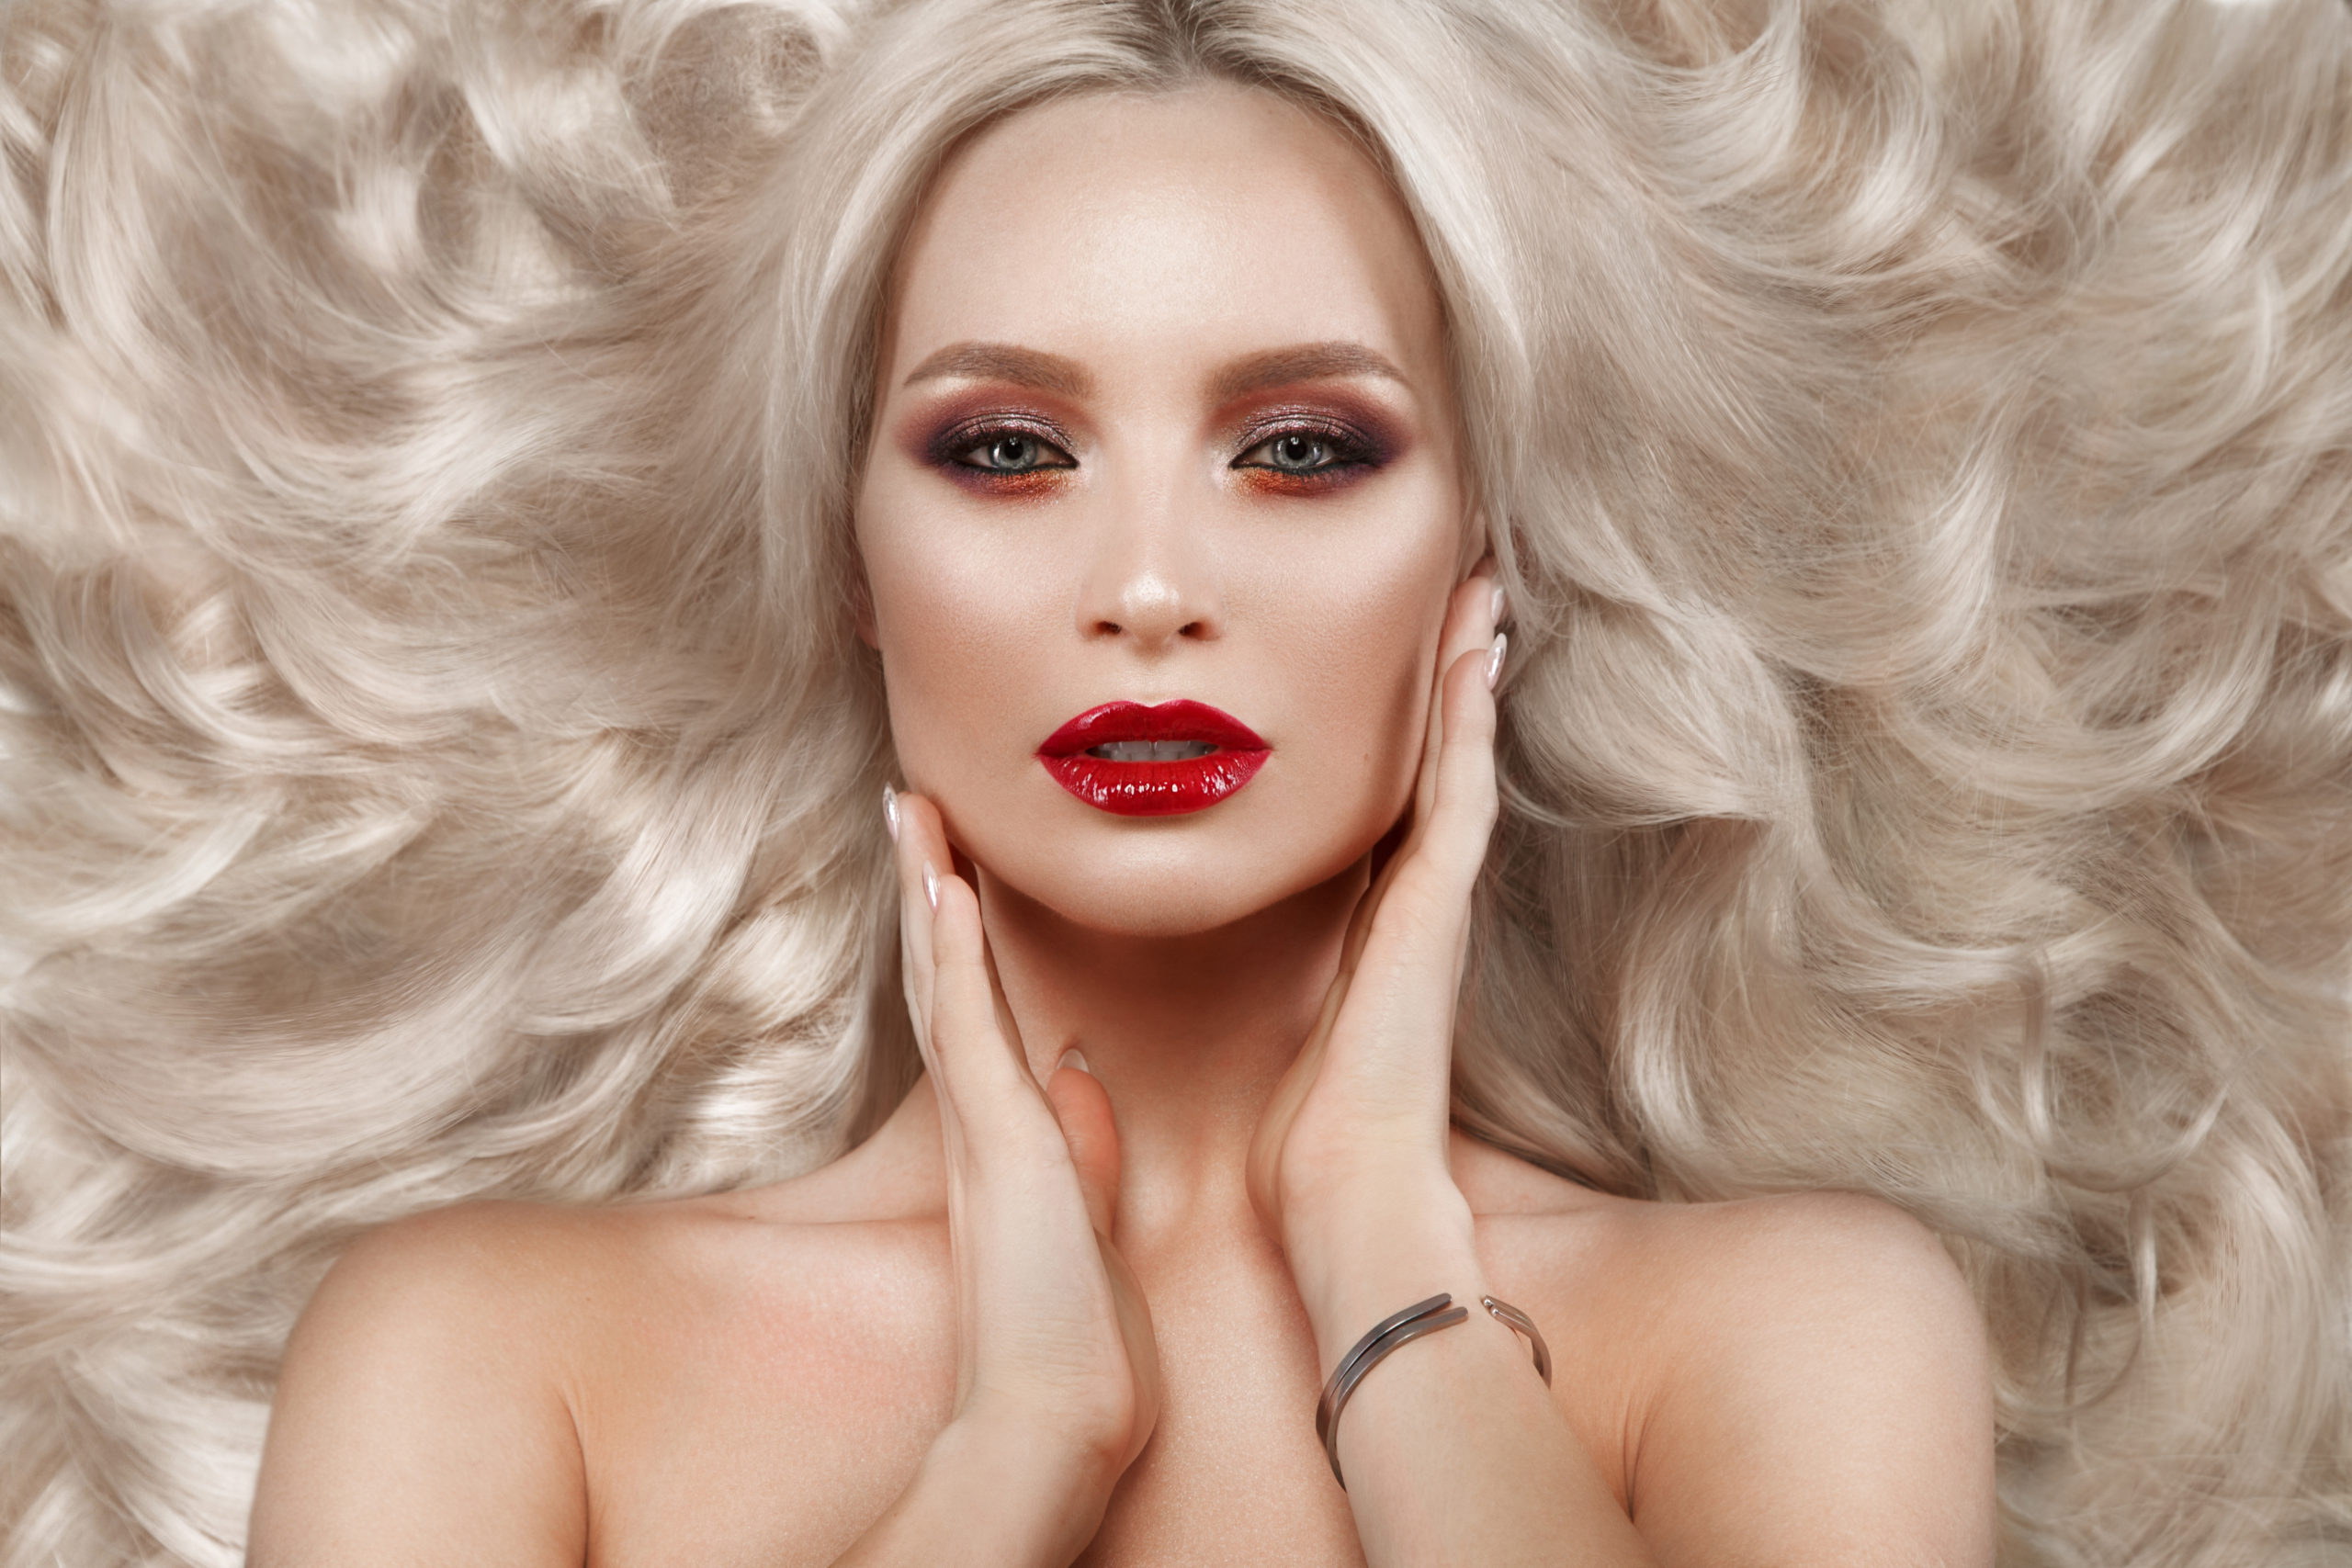
The portrait (subject) shot is a close view of the main character or subject of your story. In many cases, this will be a torso shot, a person’s face or a head-and-shoulders composition – the classic portrait. If your story’s subject isn’t a person, the “portrait” could be a tight shot of the key subject object (for example, a prized car in an automotive story, or a pet in an animal story). The portrait shot is all about who or what the story is really about, shown clearly and with minimal distractions. It’s a step closer in than the medium shot, often filling the frame with the subject themselves.
The purpose of the portrait shot is to establish an emotional connection and identity. This is often the most impactful image for human stories because it puts a name or face to the narrative. By seeing the subject up close, the audience can observe expressions, emotions, and character in detail. In fact, if everything went wrong and you could only come back with one photo from your shoot, a strong portrait of the main subject could often stand alone to tell much of the story. Portraits humanise your story – they turn a general scene into a personal tale. Viewers can empathise with a face or a main subject far more than with a crowd or landscape. Thus, the portrait shot adds the element of character and often emotion that the previous shots (wide and medium) can’t fully convey.
Techniques for the Portrait / Subject Shot
- Use a shallow depth of field (around f/1.2–f/2.8) to isolate the subject from the background.
- Frame tightly but thoughtfully—head-and-shoulders or torso—to minimise distractions while providing subtle context.
- Ensure sharp focus on the subject’s eyes to create an immediate emotional connection.
- Capture authentic expressions by engaging with your subject or waiting for candid moments.
- Consider your angle and perspective—eye level for intimacy or slightly below for strength.
- Include blurred background elements that reinforce the broader narrative without distraction.
- Experiment with posing versus candid styles to reflect the subject’s true character.
How It Differs from the Medium Shot
The portrait shot differs by isolating the subject almost completely from the broader environment. Unlike the medium shot which balances subject and setting, the portrait is predominantly about the subject itself. It adds a level of intimacy and detail in the subject’s features or form that previous shots don’t offer. Where the medium shot showed “this person in their world,” the portrait says “this is who the person is (look at their face, their eyes, their expression).” It contributes personality, mood, and often a storytelling spark through facial expression or detail. One can see textures – the wrinkles of experience, the determination in someone’s eyes, or the intricate details of a subject – which all help tell the story on a human (or close-up) level. The portrait shot does not provide context (that was the job of wide/medium), but it provides identity and emotion, which are crucial for viewer engagement.
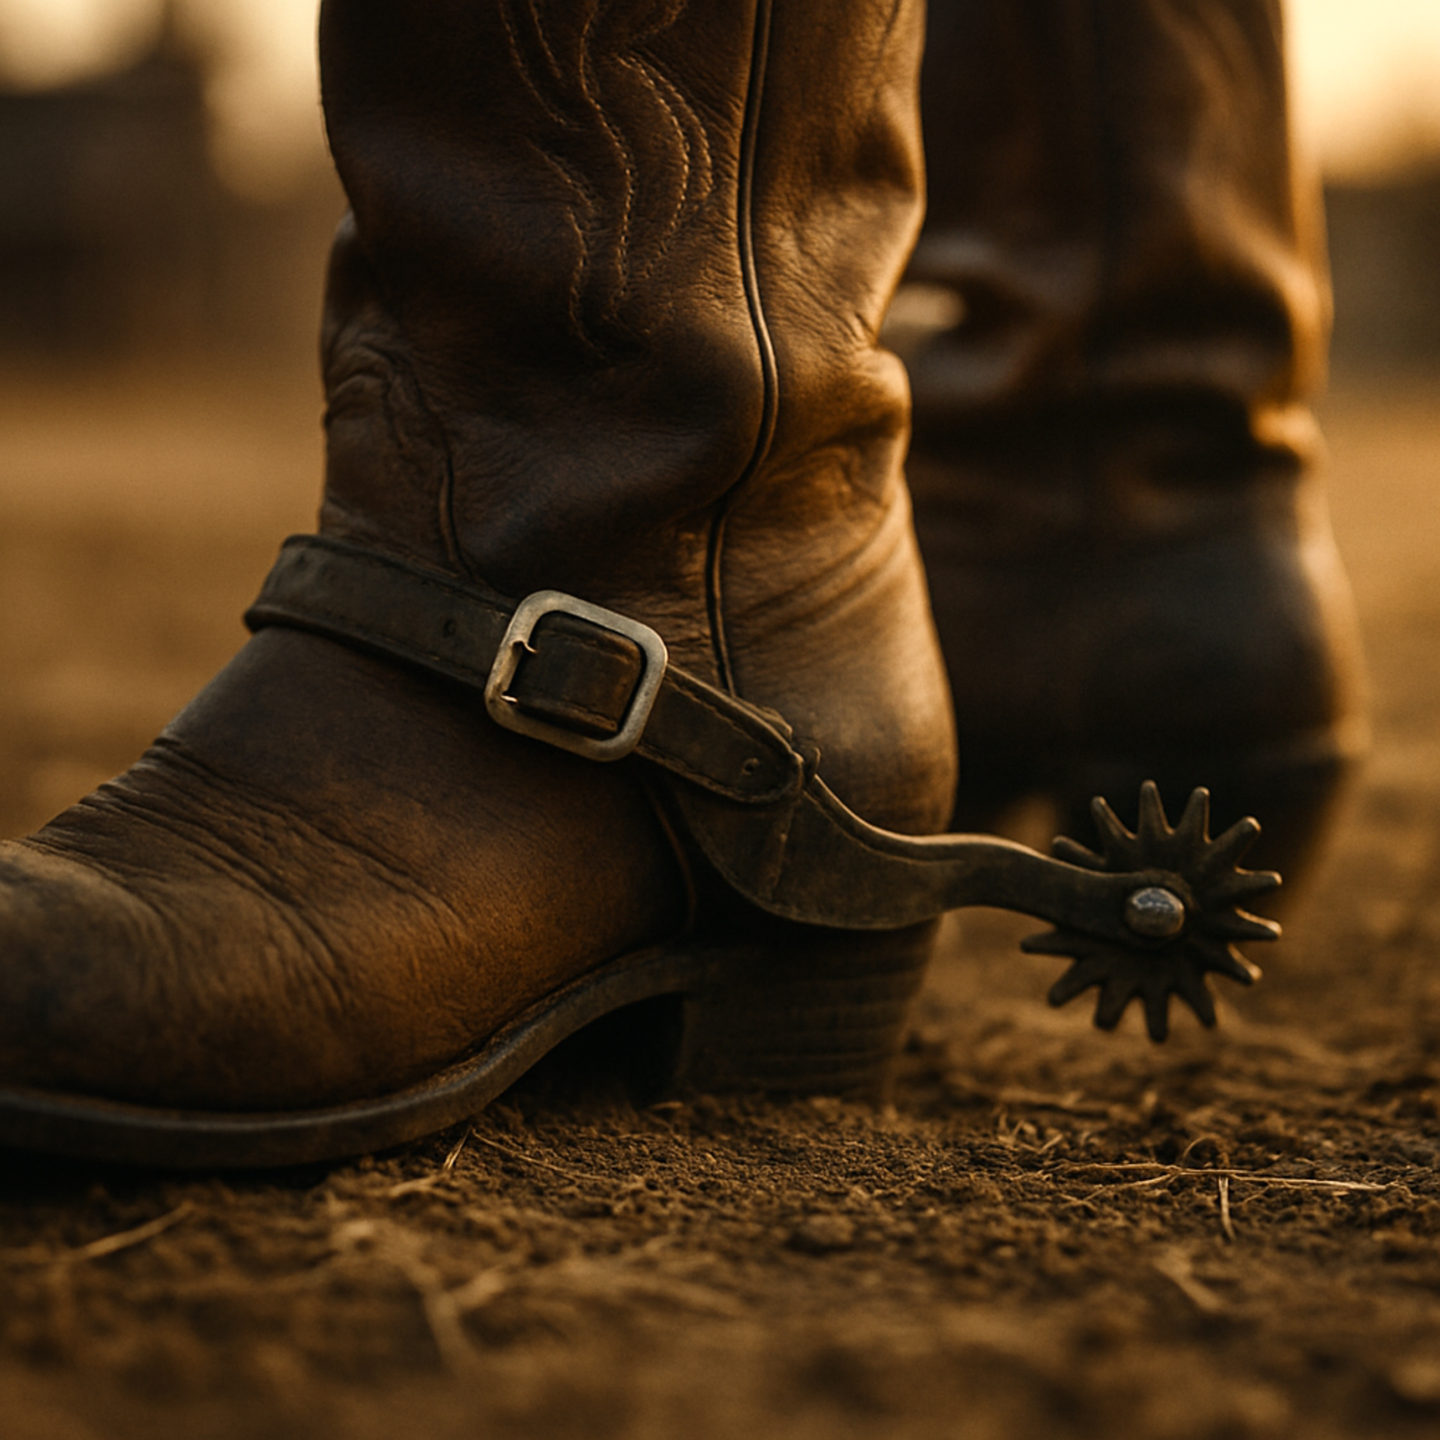
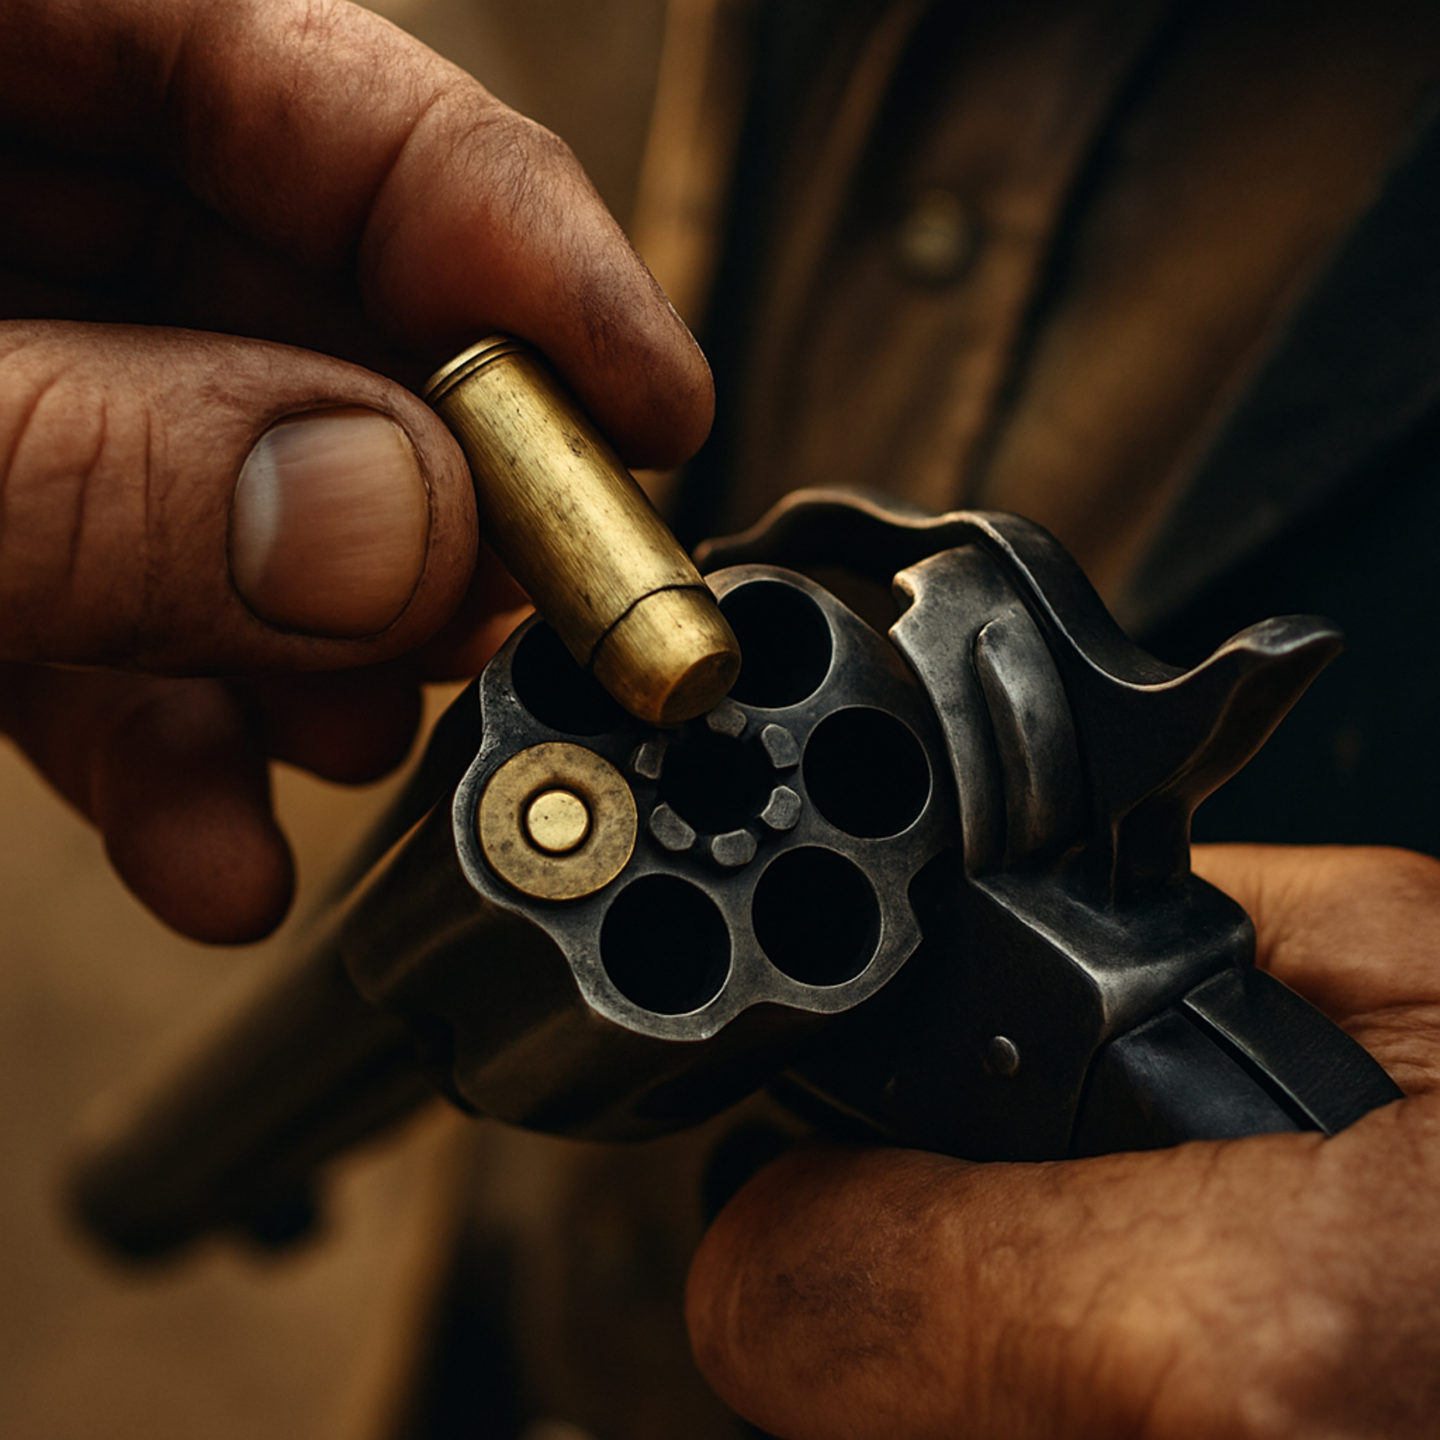
4. The Detail / Close-Up Shot
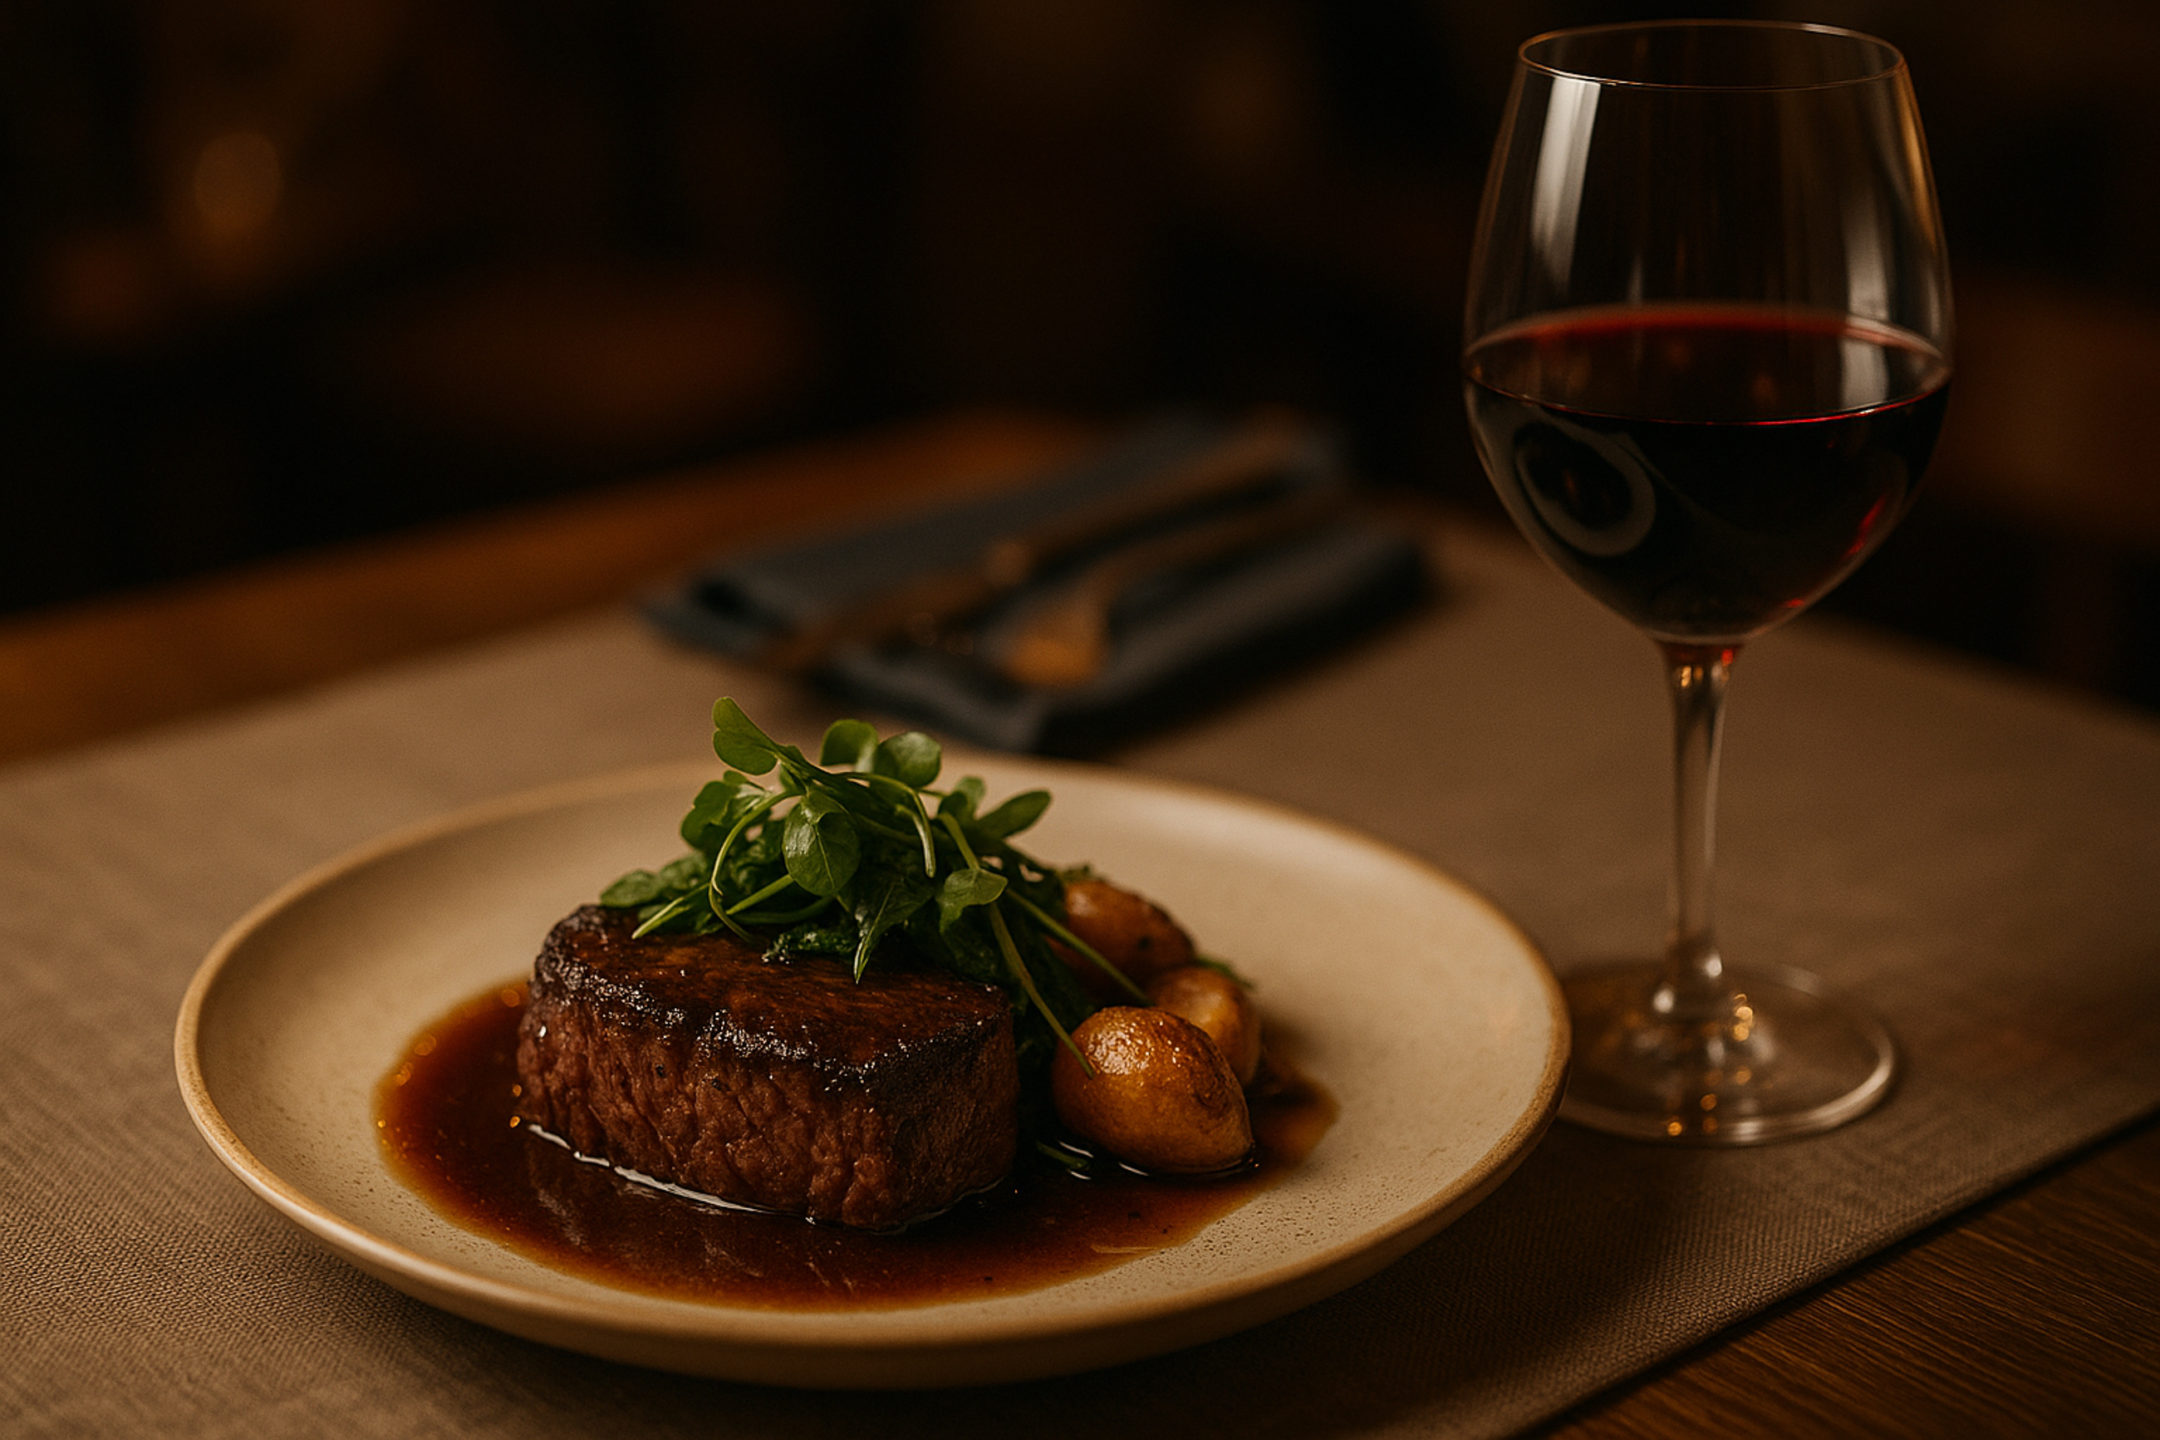
The detail shot is an extreme close-up of an object, element, or fragment of the story that symbolises or adds insight to the narrative. It might be a detail of the subject (like hands or an accessory) or an environmental detail that’s relevant (like a sign, tool, or texture in the scene). This is the shot where you focus on one specific element in a tight frame – often a shot that others might overlook. It’s sometimes called a cutaway or insert shot in storytelling, since it can be inserted to enrich the story flow.
Detail shots serve to add depth and authenticity to your visual story. They often answer questions like: What small things are important here? What details help explain the story or set the mood? These images can reveal clues about the subject’s life or the situation – details that a viewer wouldn’t catch from the wider photos. A detail shot is also great for transitions; it can connect scenes or provide a pause for the eyes in a photo sequence. Importantly, detail images often carry storytelling weight on their own, sometimes in subtle or poetic ways. This type of shot adds what the other shots don’t: nuance and texture. It’s the difference between a generic story and a story rich with specific, memorable elements. Many storytelling courses note that the detail shot is the one most frequently forgotten by photographers, yet it holds great storytelling potential – it can make your story more convincing and immersive.
Techniques for the Detail / Close-Up Shot
- Use a macro lens or smartphone close-up mode to capture intricate textures or small details.
- Employ a shallow depth of field (around f/2.8–f/4) to isolate the detail from the background.
- Identify symbolic or storytelling elements, such as worn tools or cultural artefacts.
- Explore unusual angles or perspectives to transform ordinary details into compelling images.
- Highlight textures and patterns, like cracked wood or woven fabric, to add sensory richness.
- Position the detail to soft or directional lighting, accentuating textures.
- Frame tightly and deliberately, eliminating distractions to keep the viewer’s focus on the detail.
- Include subtle visual clues or context to help viewers relate the detail to the wider narrative.
How It Differs from the Portrait Shot
The detail/close-up is even more specific and tight than a portrait. It usually doesn’t show an entire face or subject, but rather part of something. It differs from all previous types in that it might not be immediately clear what the bigger picture is – and that’s okay, because its role is to supplement and support the main story with interesting bits. What it adds to the story that others don’t is clarity on specific elements and a sense of realism: viewers start to notice the little things that make the story unique. A wide or medium shot might show a general scene, but a close-up of, say, worn hands tells of the labour and age of a person, or a close shot of decorations might highlight the care put into an event. Detail shots often carry emotional weight too: think of a photograph of a tear rolling down a cheek (detail) versus a full portrait of a crying person – both powerful, but the detail isolates a single telling aspect, sometimes making it even more evocative. In sum, the detail shot complements your other images by providing the story’s texture – those tactile, specific references that ground the story in reality and feeling.
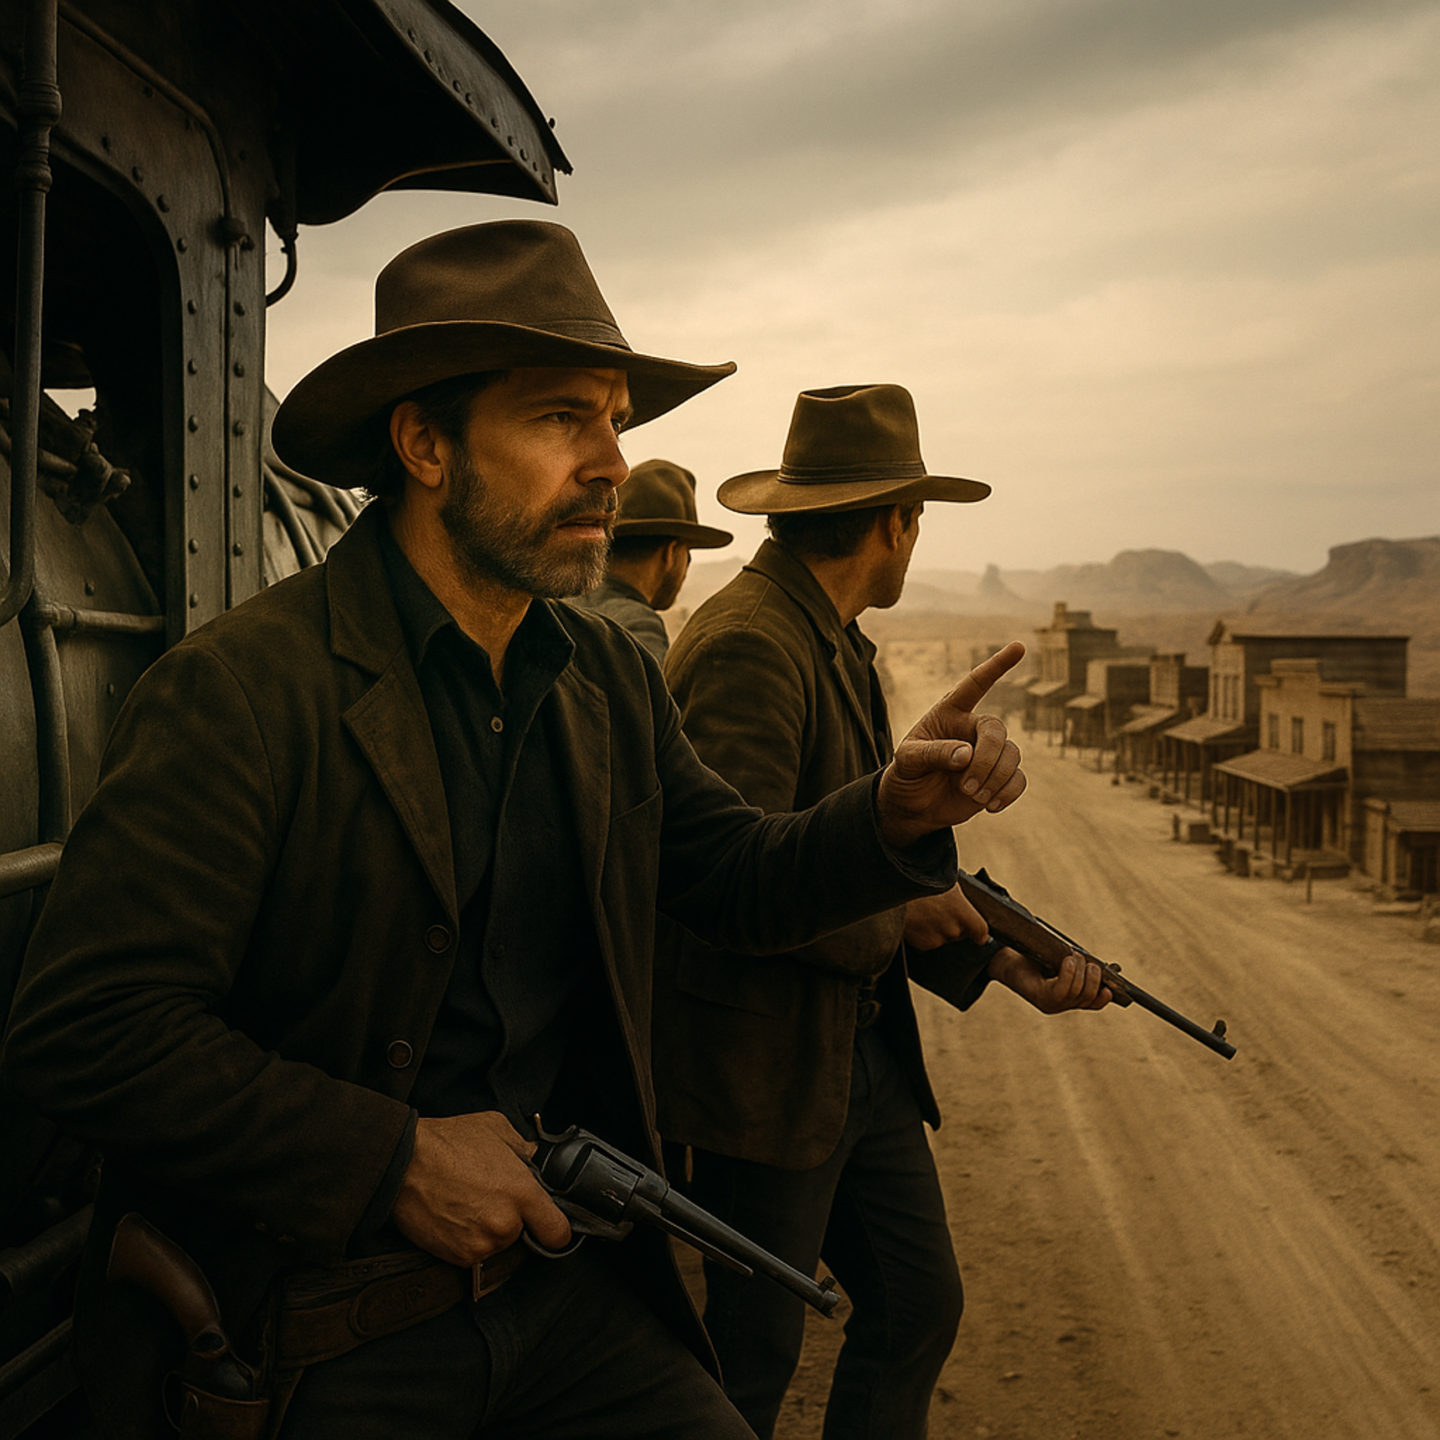
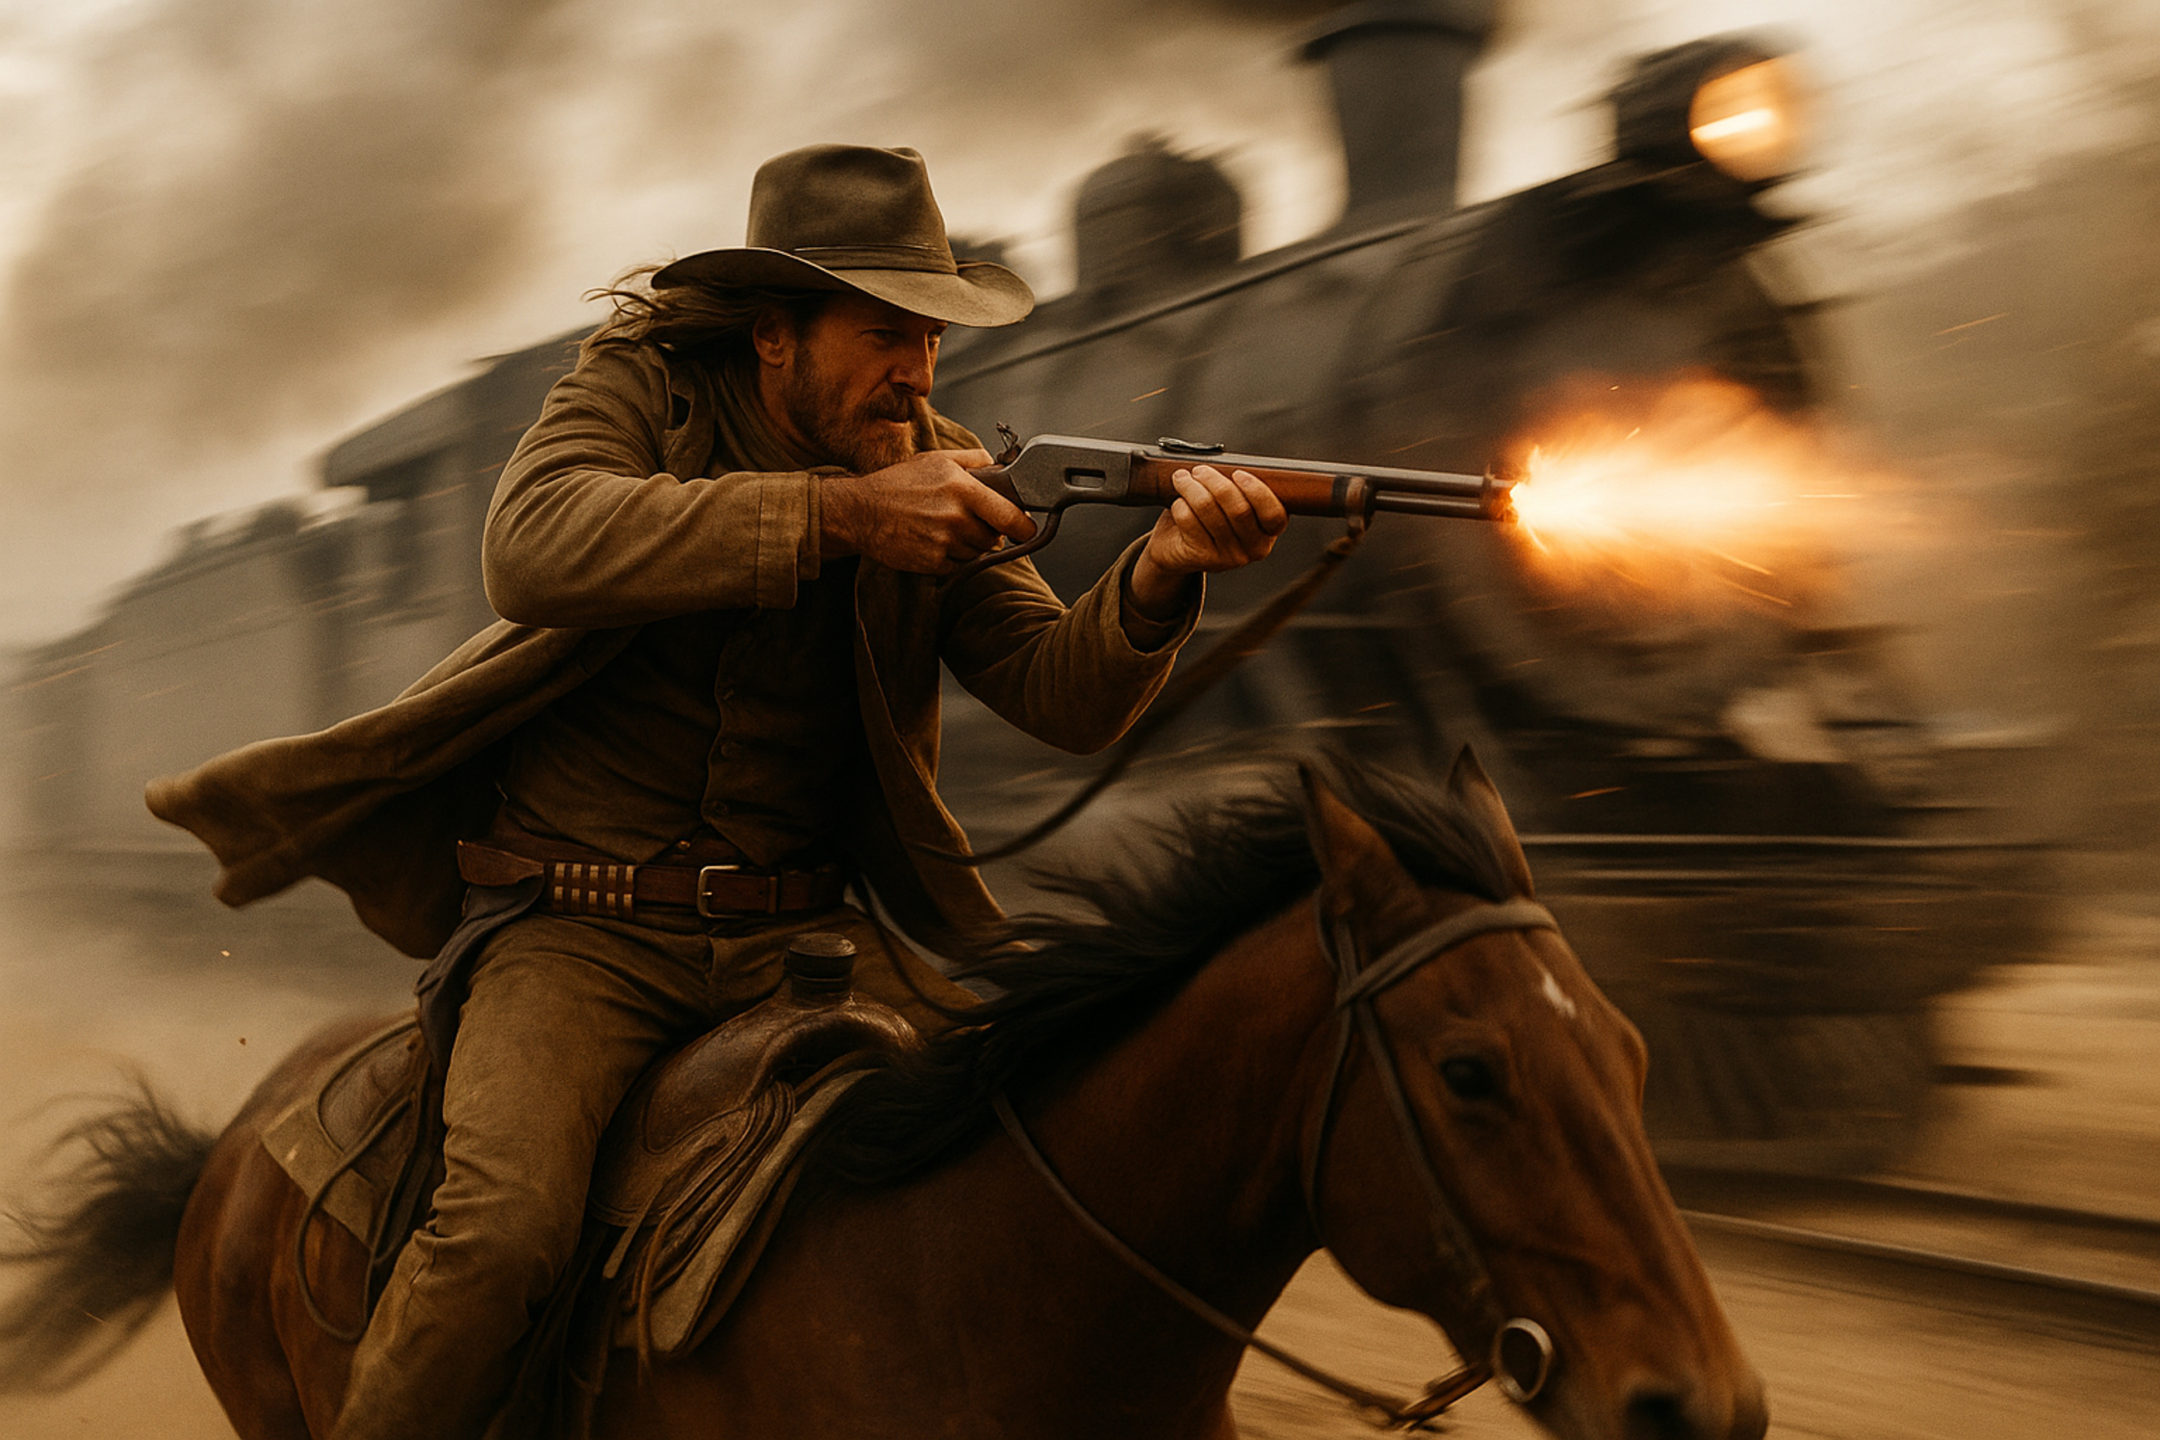
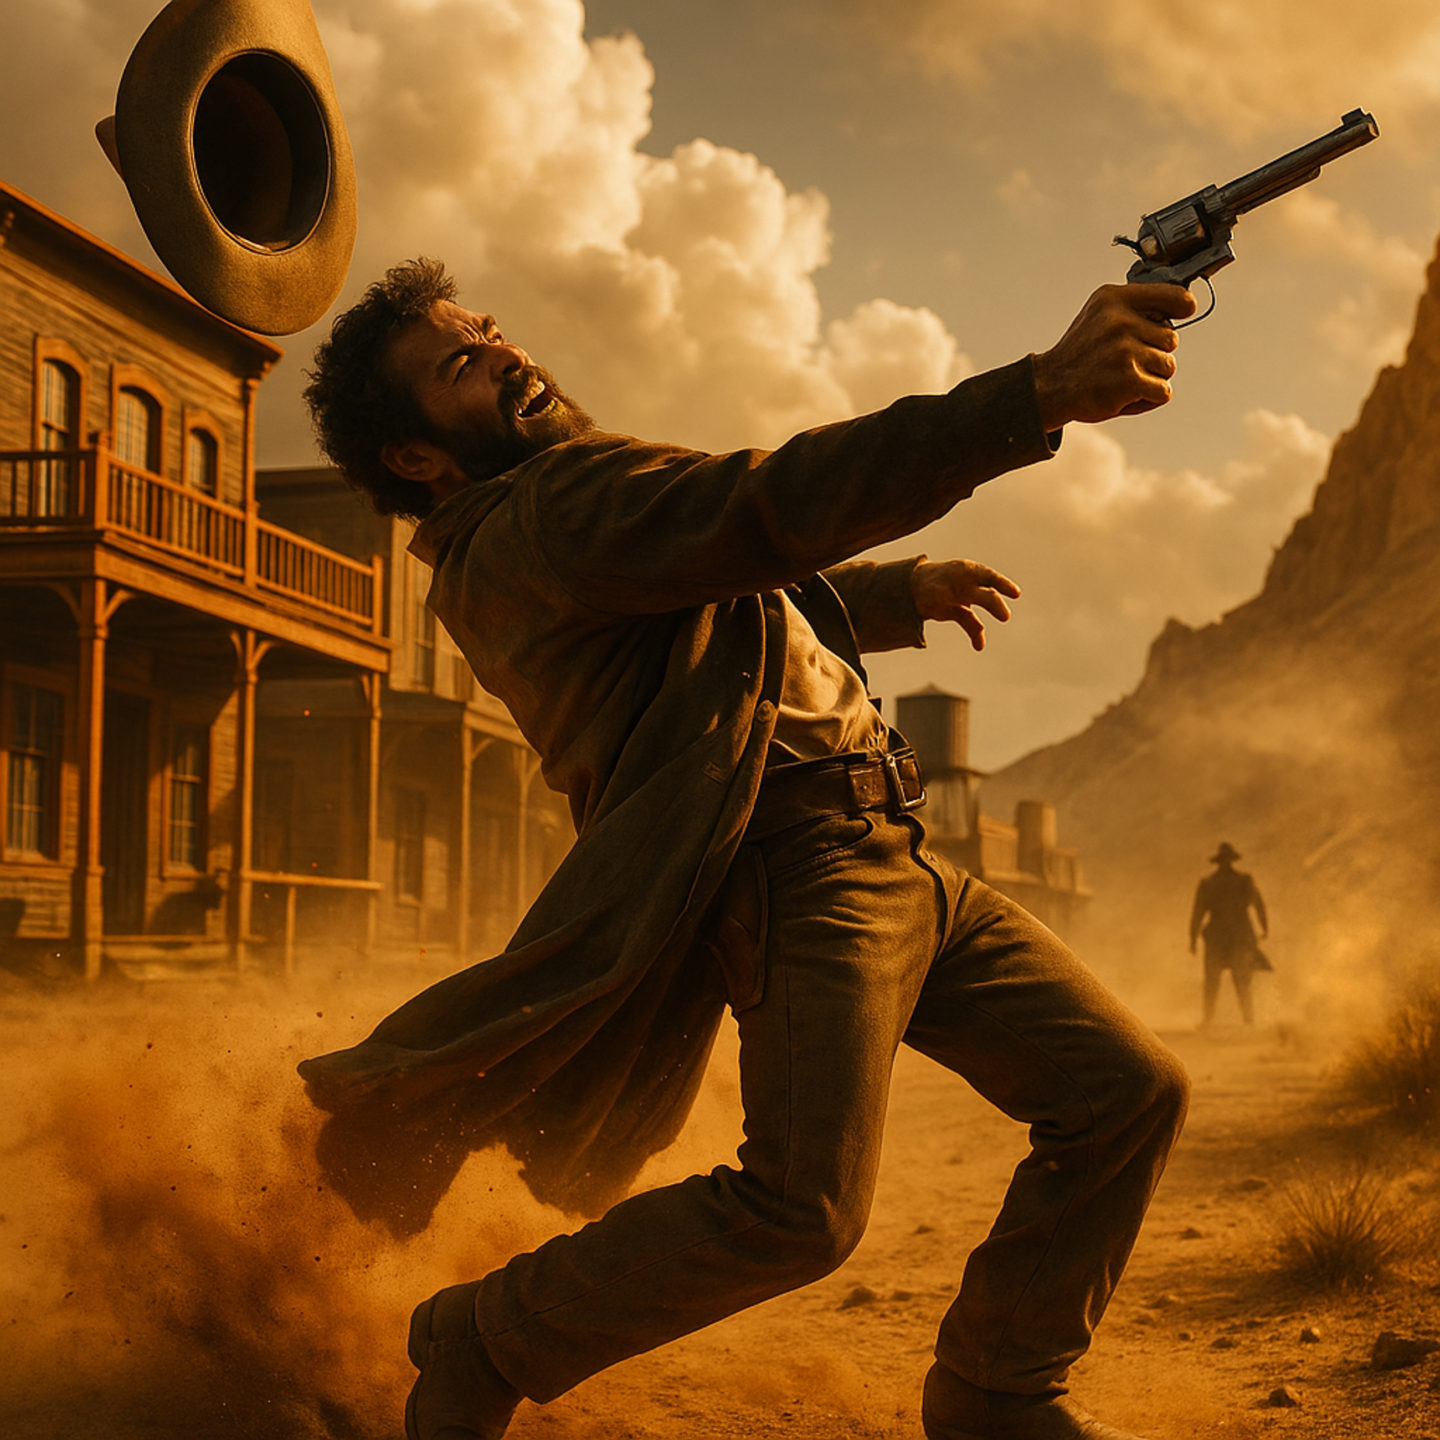
5. The Action / Emotive Shot
The action or emotive shot is a dynamic image capturing movement or a moment of strong emotion that is crucial to the story. It often involves photographing the subject doing something (an activity, an interaction, a candid moment) or reacting emotionally in a way that adds drama to the narrative. This shot can be tricky – it’s about timing and anticipation, since you’re aiming to freeze a key moment that conveys energy or feeling. In short, the action/emotive shot shows the story in progress, not just static.
This shot type brings your story to life through motion or emotion. While the other shots set the scene, introduce characters, and highlight details, the action shot is about what’s happening – it provides a sense of time and momentum. Including an action shot makes the sequence of images feel active and engaging. It is often the most memorable shot in a series because it depicts a peak moment: a decisive laugh, a gesture, a movement, or a conflict. In terms of story, it can function like the climax or a turning point in a narrative, injecting excitement or sentiment. An action shot adds something unique that static shots might lack: movement, emotion, and immediacy – the viewer almost experiences the moment unfolding. For instance, photojournalists consider action images essential for making viewers feel present at an event.
Techniques for the Action / Emotive Shot
- Anticipate the peak moment, observing closely to capture expressions or movements at their apex.
- Use a fast shutter speed (around 1/500s or faster) to freeze dynamic action.
- Employ burst mode or continuous shooting to capture fleeting moments.
- Focus on expressive faces or gestures, like raised hands or joyful expressions.
- Experiment with motion blur using slower shutter speeds (around 1/30–1/60s) to convey movement.
- Choose dynamic angles, such as low or side viewpoints, to amplify impact.
- Use natural framing, like doorways or crowds, to direct attention to the action.
- Stay patient and unobtrusive to capture genuine, spontaneous moments.
How It Differs from Other Shots
The action/emotive shot is distinct because it’s all about capturing a fleeting moment, whereas the other shots can be more deliberately composed and static. It adds a sense of movement and emotion that the other types (especially wide, medium, detail) might not convey. Unlike a portrait which is posed or at least stationary, an action shot often has blur, motion, or candid expressions – it’s less controlled. What it contributes is the story’s momentum and emotional high points. It might be challenging – photographers sometimes take dozens of frames to get the perfect action shot – but even if you somehow miss the ideal action moment, remember that the other four shots can still stand on their own to tell a solid story. Danie Bester often reminds students not to rely solely on catching that one dramatic moment; ensure you have the foundation (context, characters, details) first, and consider the action shot the “cherry on top.” In fact, once you’ve secured the other shots, you can fully focus on waiting for or prompting that key action – treating it as the icing on the cake that makes your visual story truly compelling. When successfully captured, an action or emotive photograph ties everything together by showing the story in motion and often evokes the strongest reaction from your audience.
The Importance of Variety and Using All Five Shots
Many photographers naturally gravitate towards their favourite shot type—some love wide landscapes, while others focus on faces or details. The Five Shots of Storytelling framework challenges you to step outside that comfort zone. By deliberately capturing all five shots, you ensure a more complete and engaging visual story. Here’s why:
- Broader Visual Storytelling: Each shot adds a unique layer—context, character, emotion, detail, and energy—creating a rich, multi-dimensional narrative.
- Better Coverage of Events & Projects: The five-shot checklist guarantees you won’t miss key elements, providing a comprehensive set of images for albums, blogs, or photo essays.
- Stronger Storytelling Sequences: When presenting your photos, the variety allows you to sequence them in a compelling way, mimicking the flow of a well-told story.
- Encourages Creative Growth: This framework pushes you to practise new techniques and develop a well-rounded skill set, making you a more adaptable and story-focused photographer.
In conclusion, the Five Shots of Storytelling is a practical checklist and creative exercise that ensures you cover all the bases of a visual story. Especially in the era of mobile photography, this framework helps you go beyond snapshots to true storytelling. Next time you’re out with your camera or phone, challenge yourself to capture at least one of each of these five shots. You’ll find that the process not only yields a richer set of images but also trains you to see stories unfolding in every scene. Embrace the variety; your visual stories will be all the stronger for it, and your audience will thank you with their attention and emotion as they step into the narrative you’ve thoughtfully crafted.
***
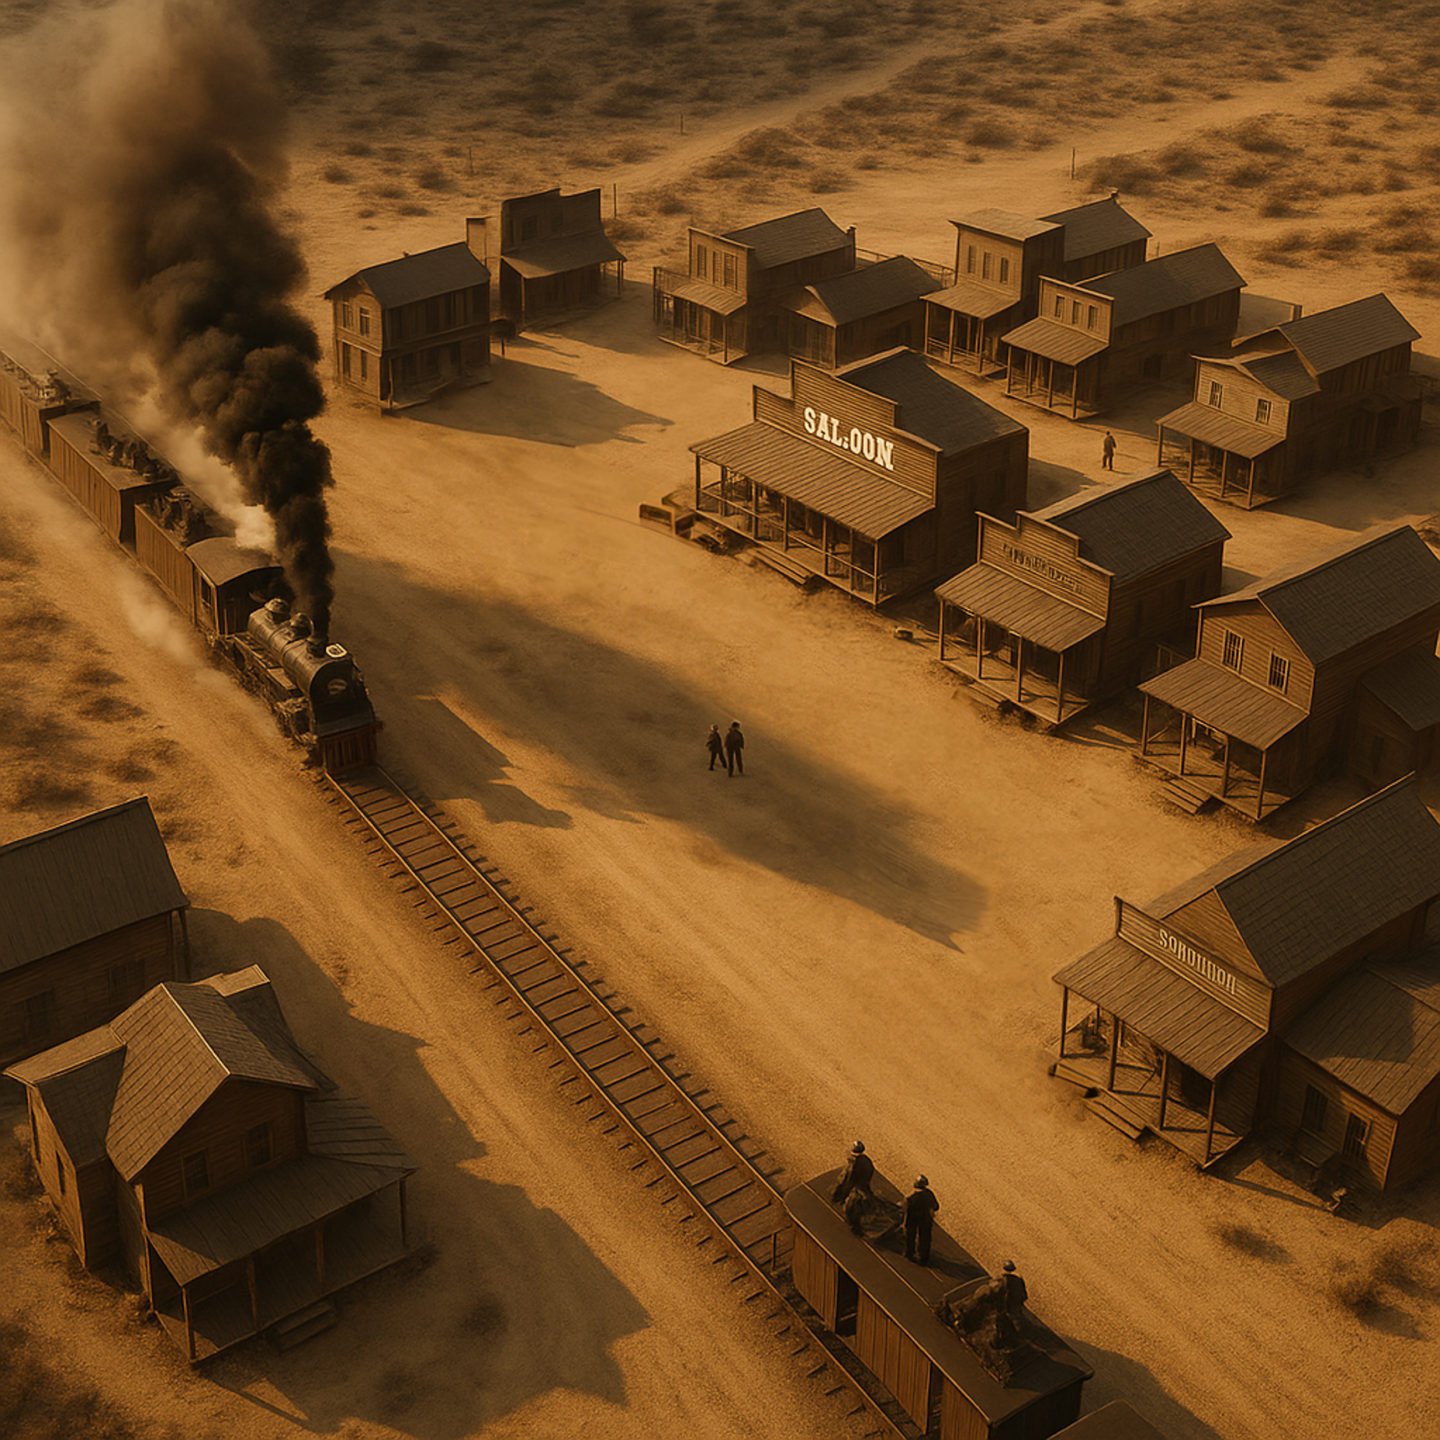
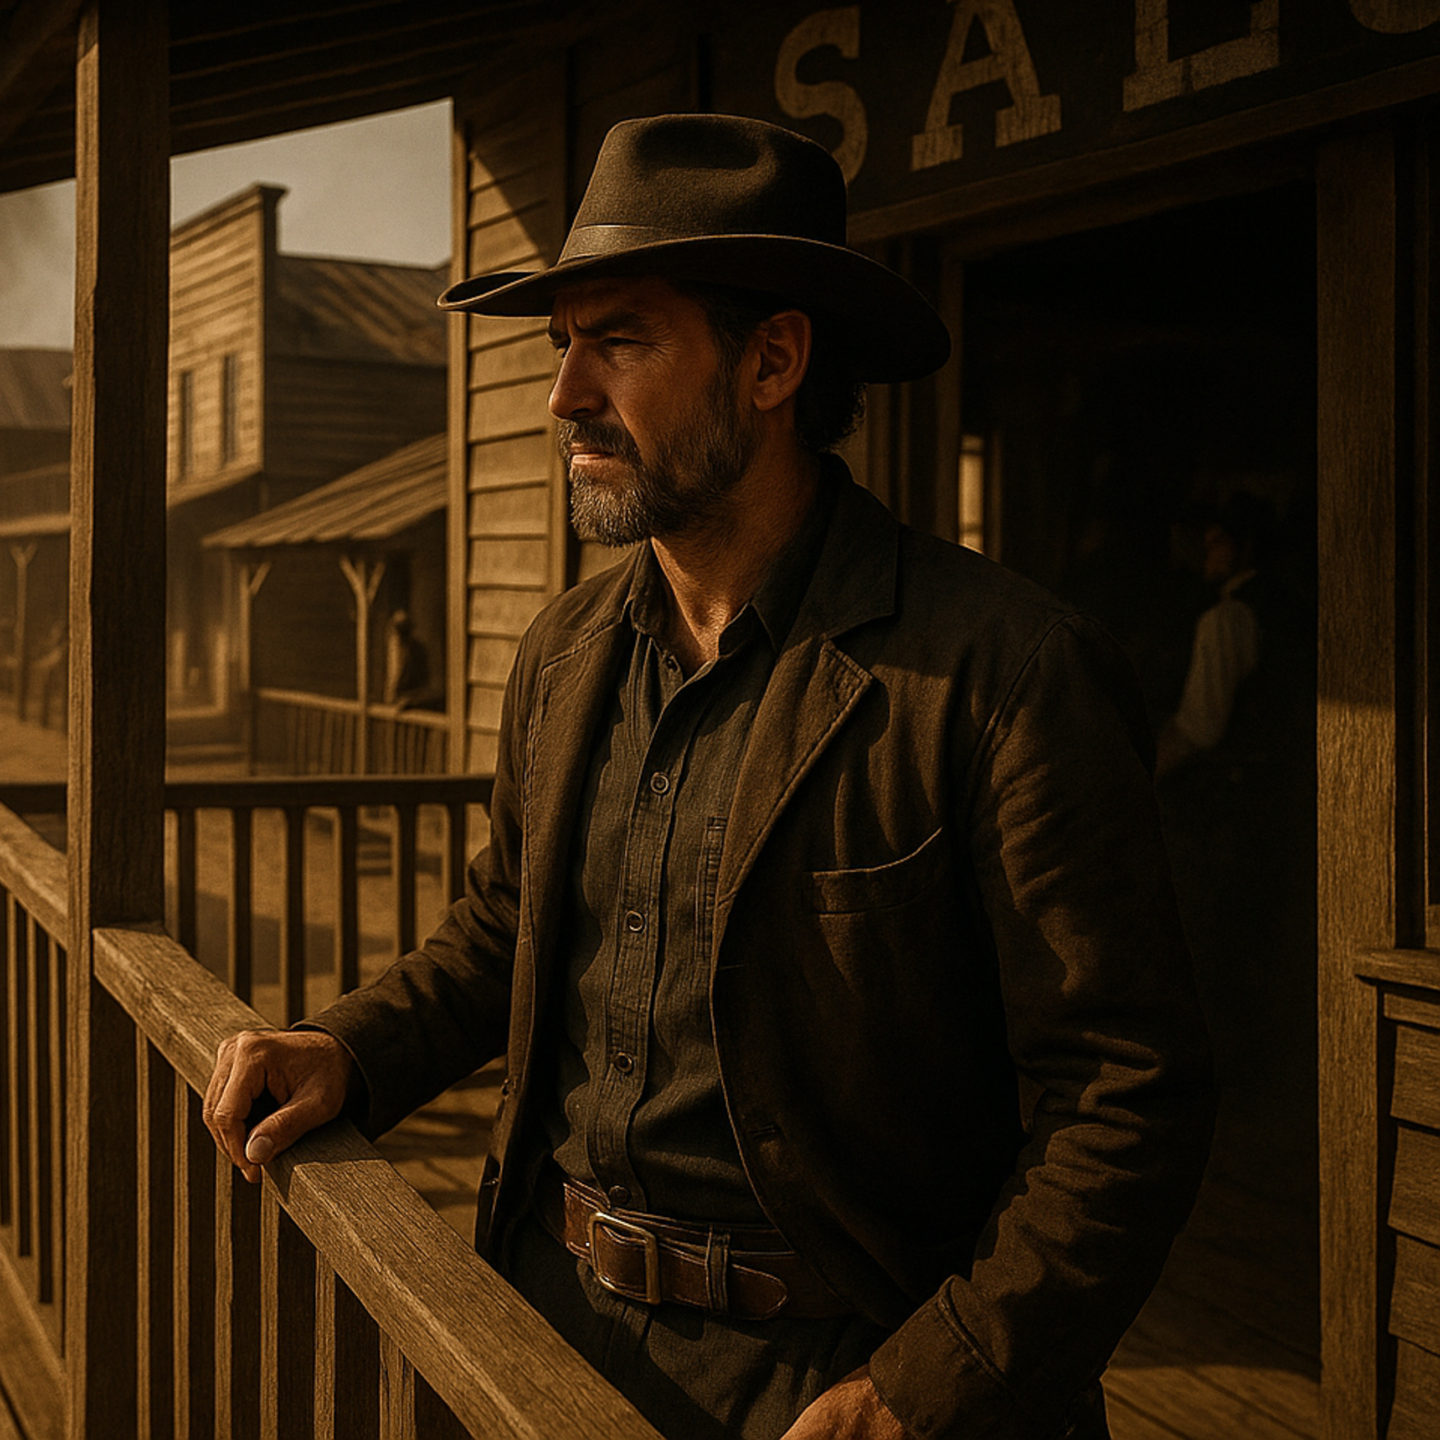
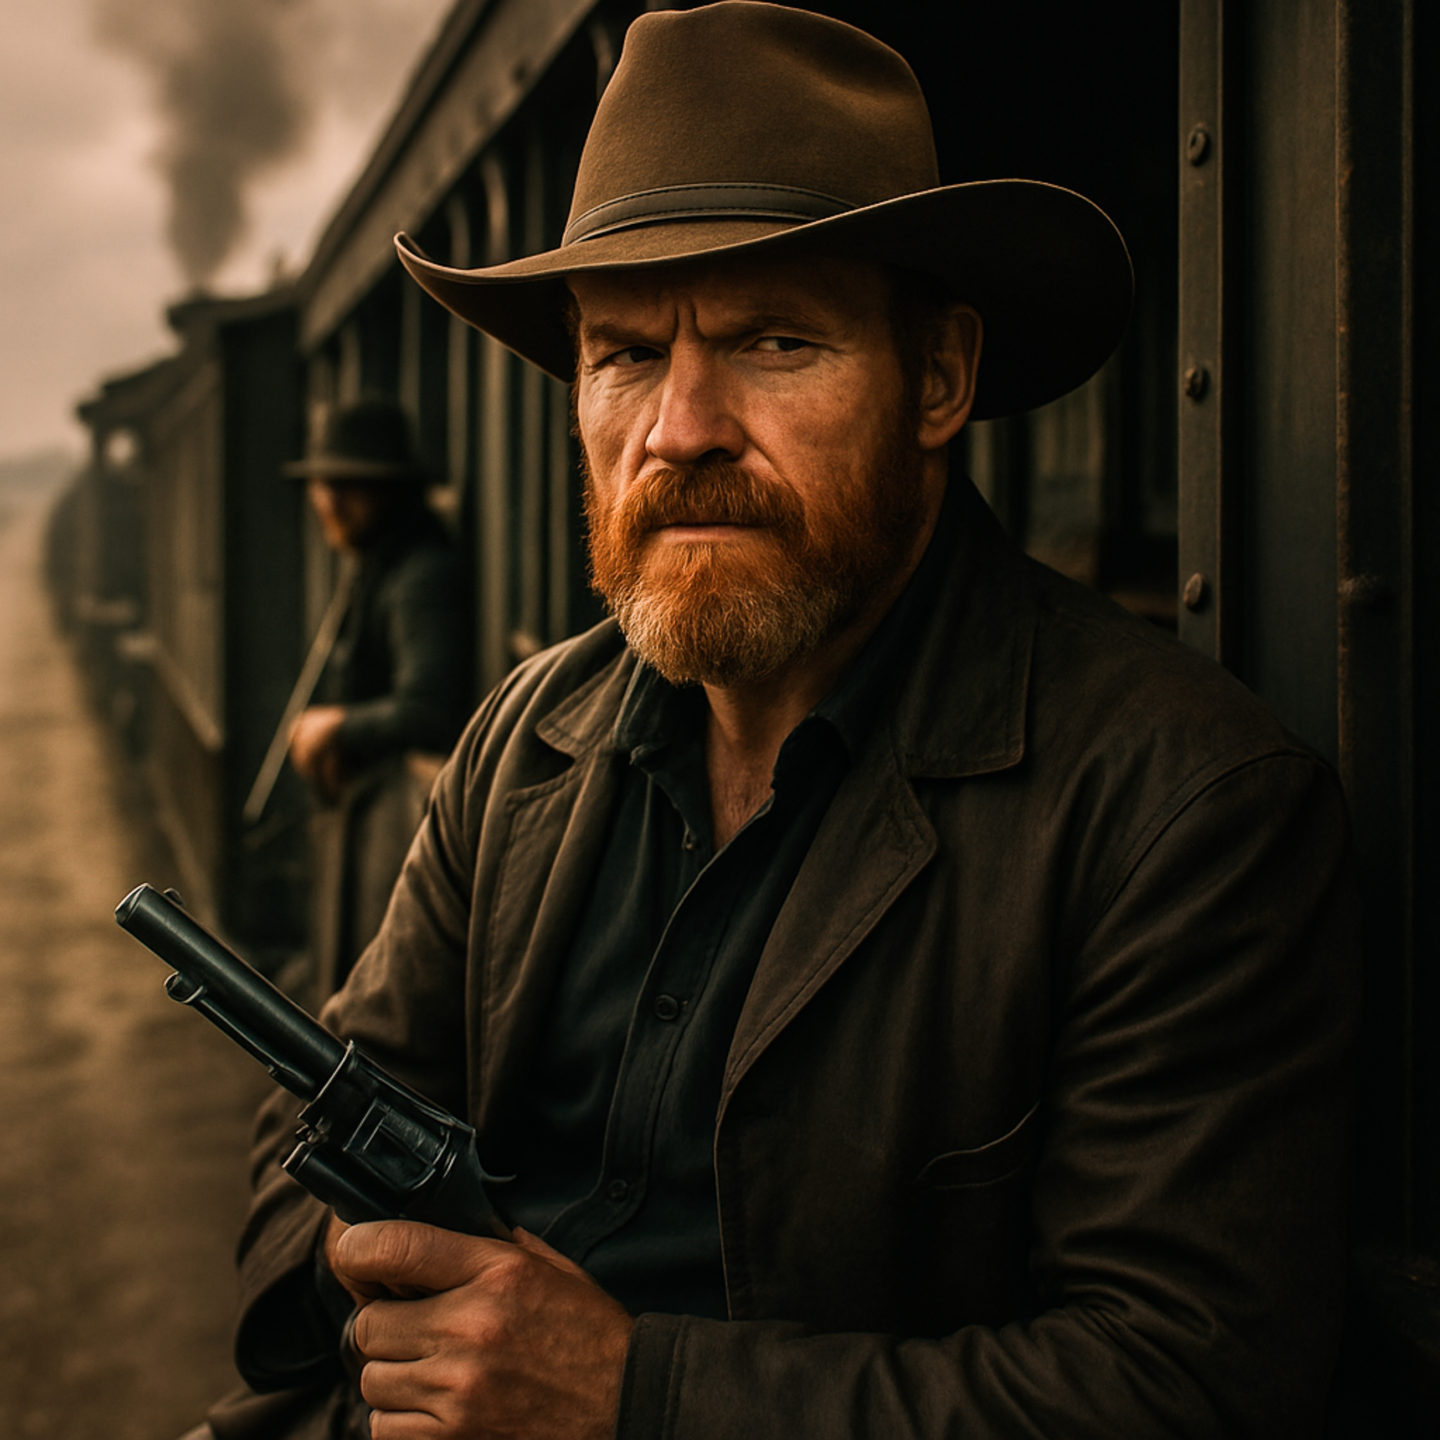
Showdown at Dust Creek
Our last examples take you into the dusty heart of the Old West with Showdown at Dust Creek—a cinematic story brought to life entirely using AI tools. Every image in this series was generated from prompts I carefully crafted, combining storytelling ideas, visual composition, and technical direction into one flowing sequence.
Now, I’ll be the first to admit—this story is far from perfect. But I’m fairly happy with how it turned out, and I’ll definitely revisit it. I’m currently researching a variety of tools and workflows to refine this kind of storytelling even further. So, tune in again at a later stage—I’ll be sharing updates as this project evolves.
In the meantime, I encourage you to explore the five storytelling shots—Wide, Medium, Portrait, Detail, and Action—and think about how you would approach them in your own story. What would your version of Dust Creek look like? What moment would you freeze?
Better still, create your own theme. Write prompts for each of the five shots and see what comes to life. Yes, it’s a learning curve—but it’s one that sharpens your eye, strengthens your narrative instincts, and makes you a more intentional photographer.
Let me know what you think—and give it a go. Your next story might already be waiting in your camera or sketchbook.
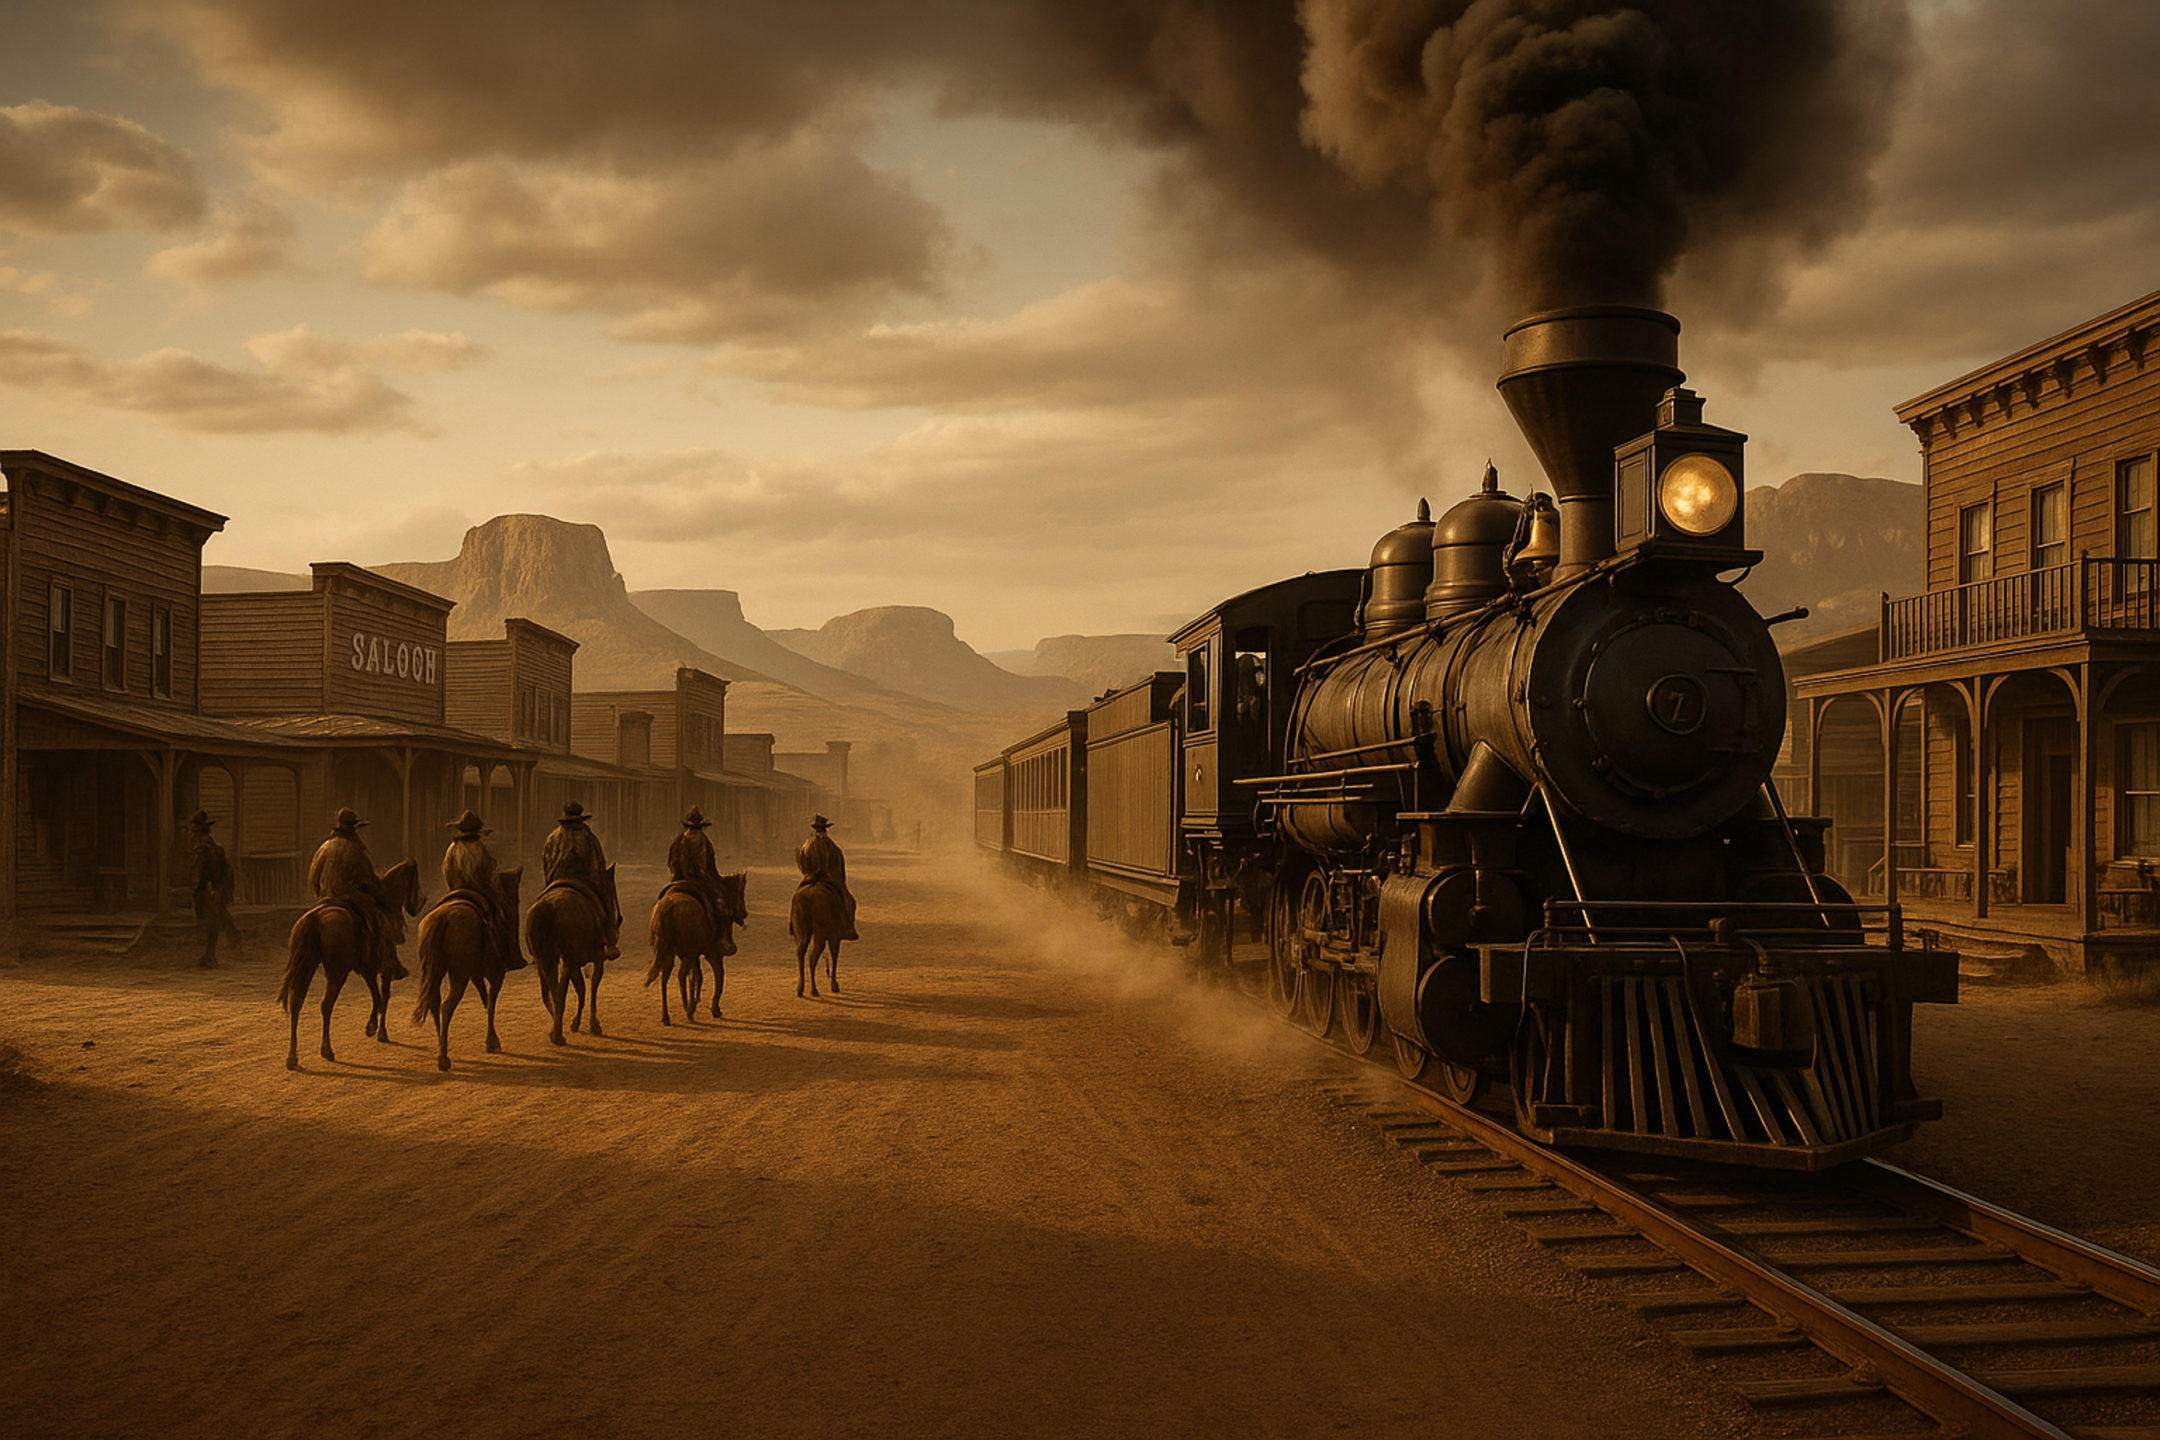
1. Wide/Establishing Shots
2. Medium / Environmental Shot
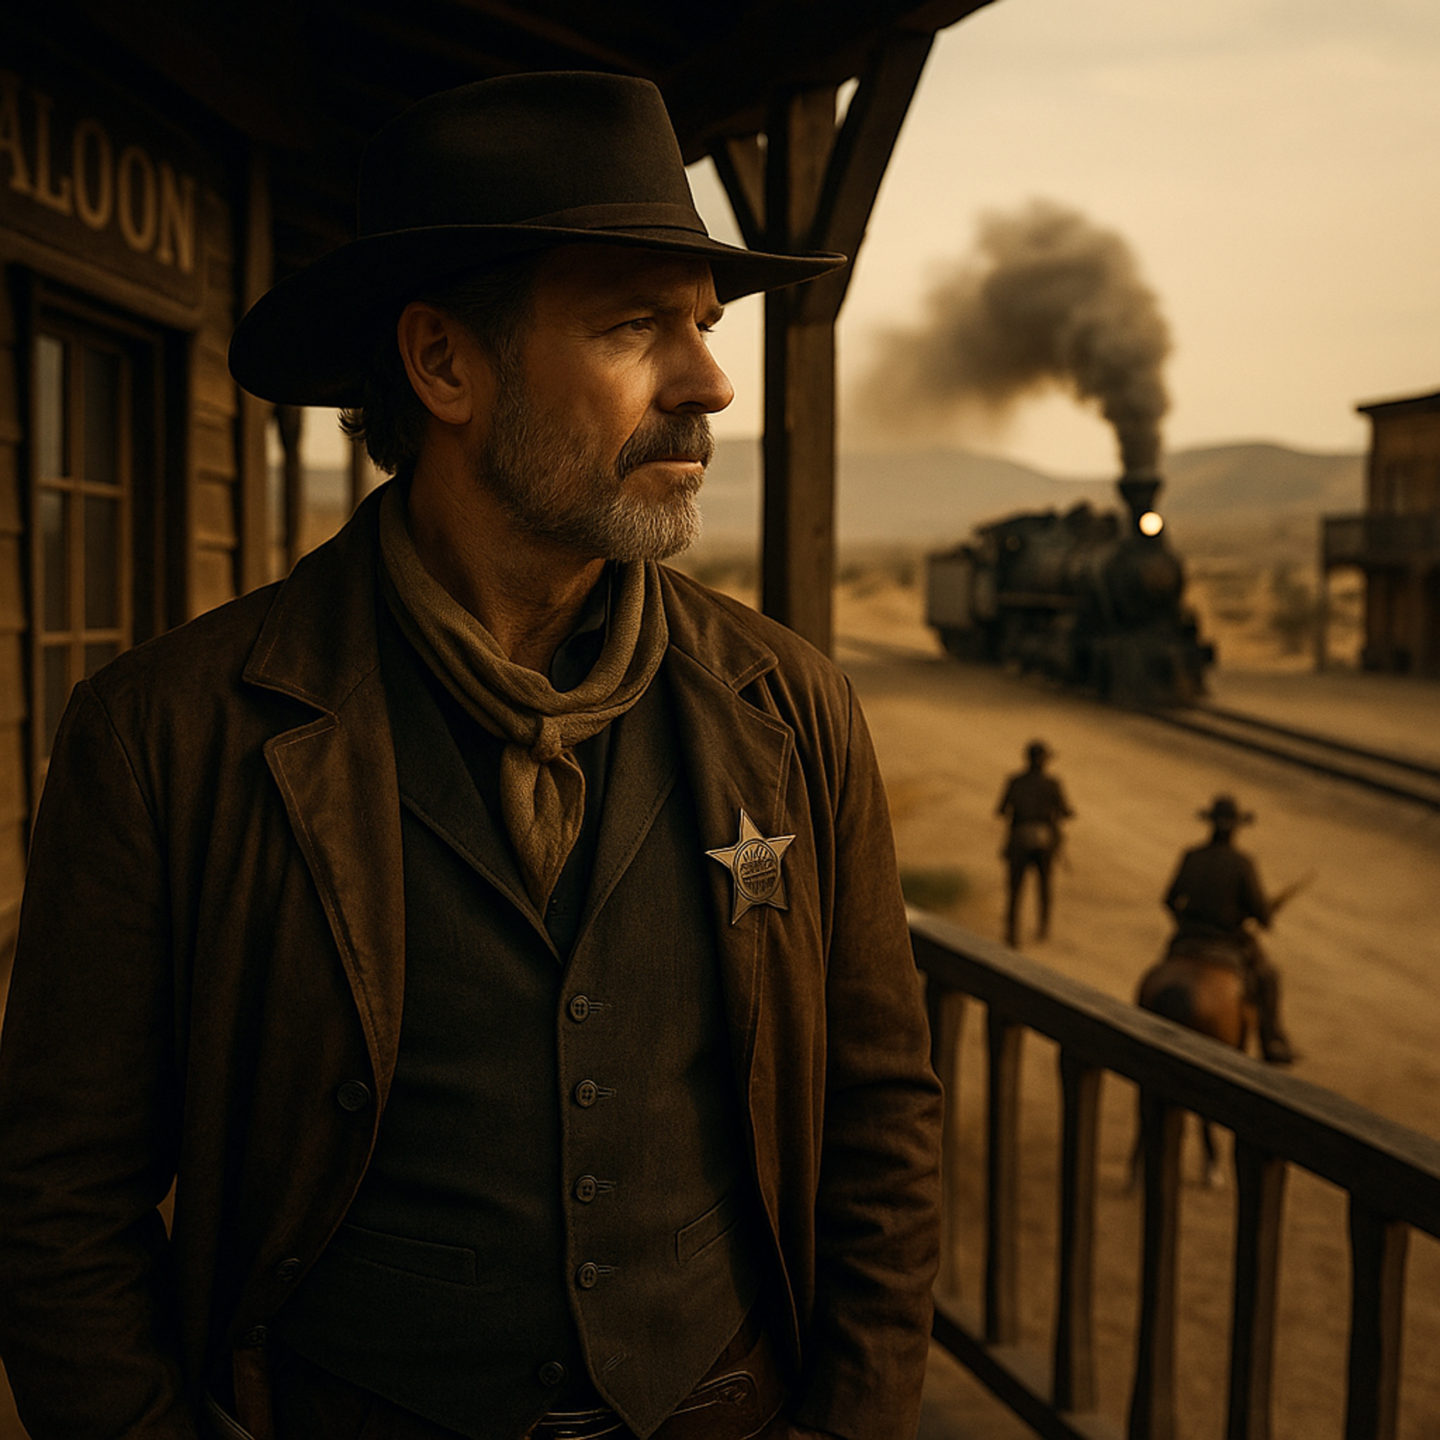
3. Portrait / Subject Shot
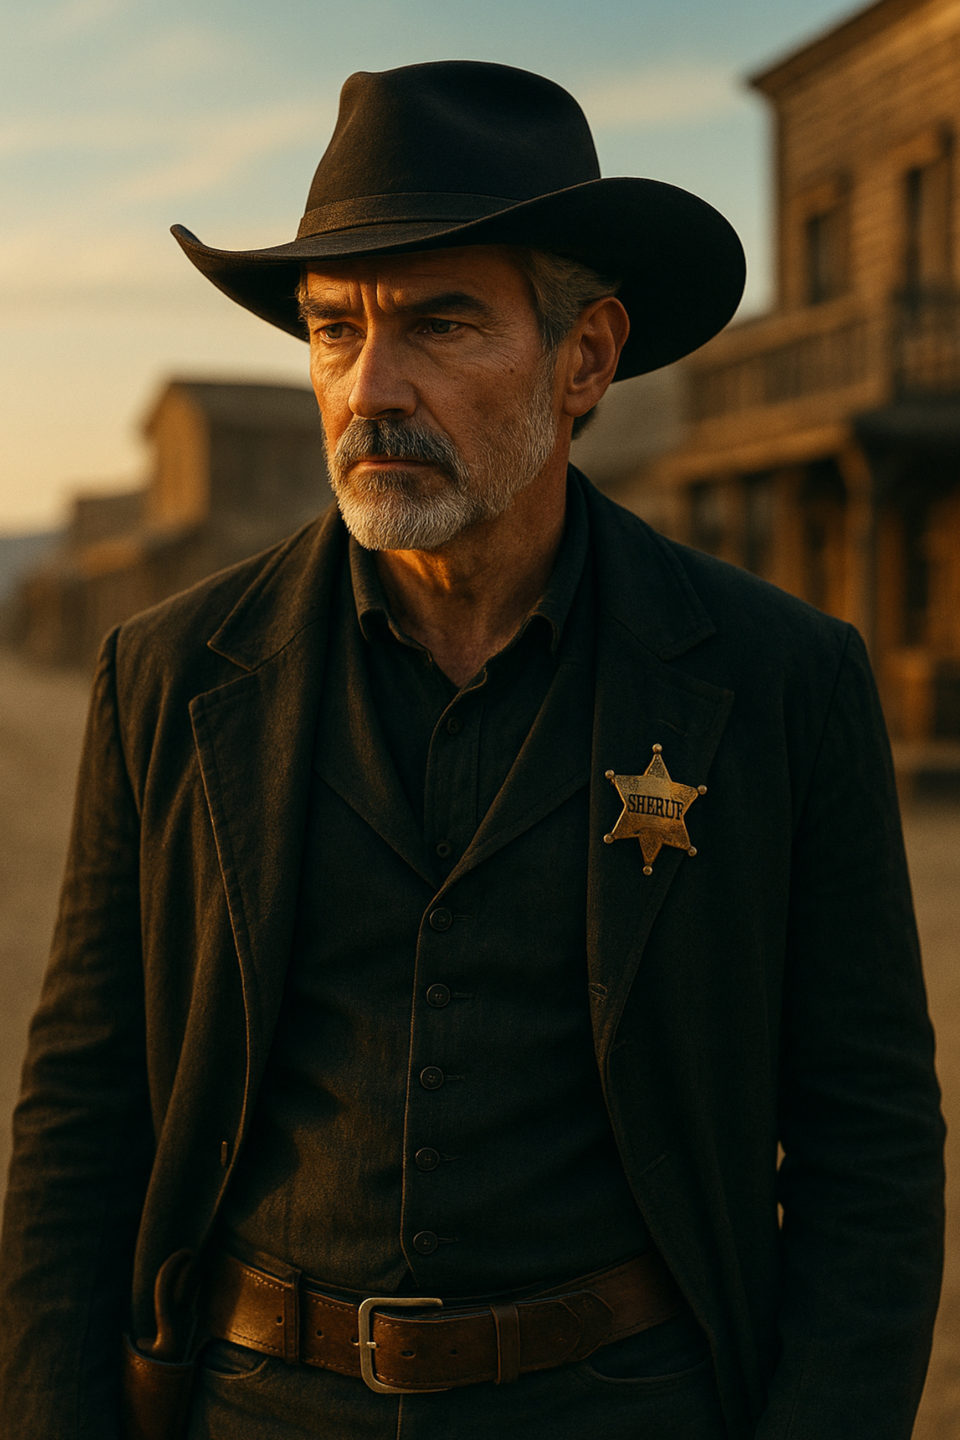
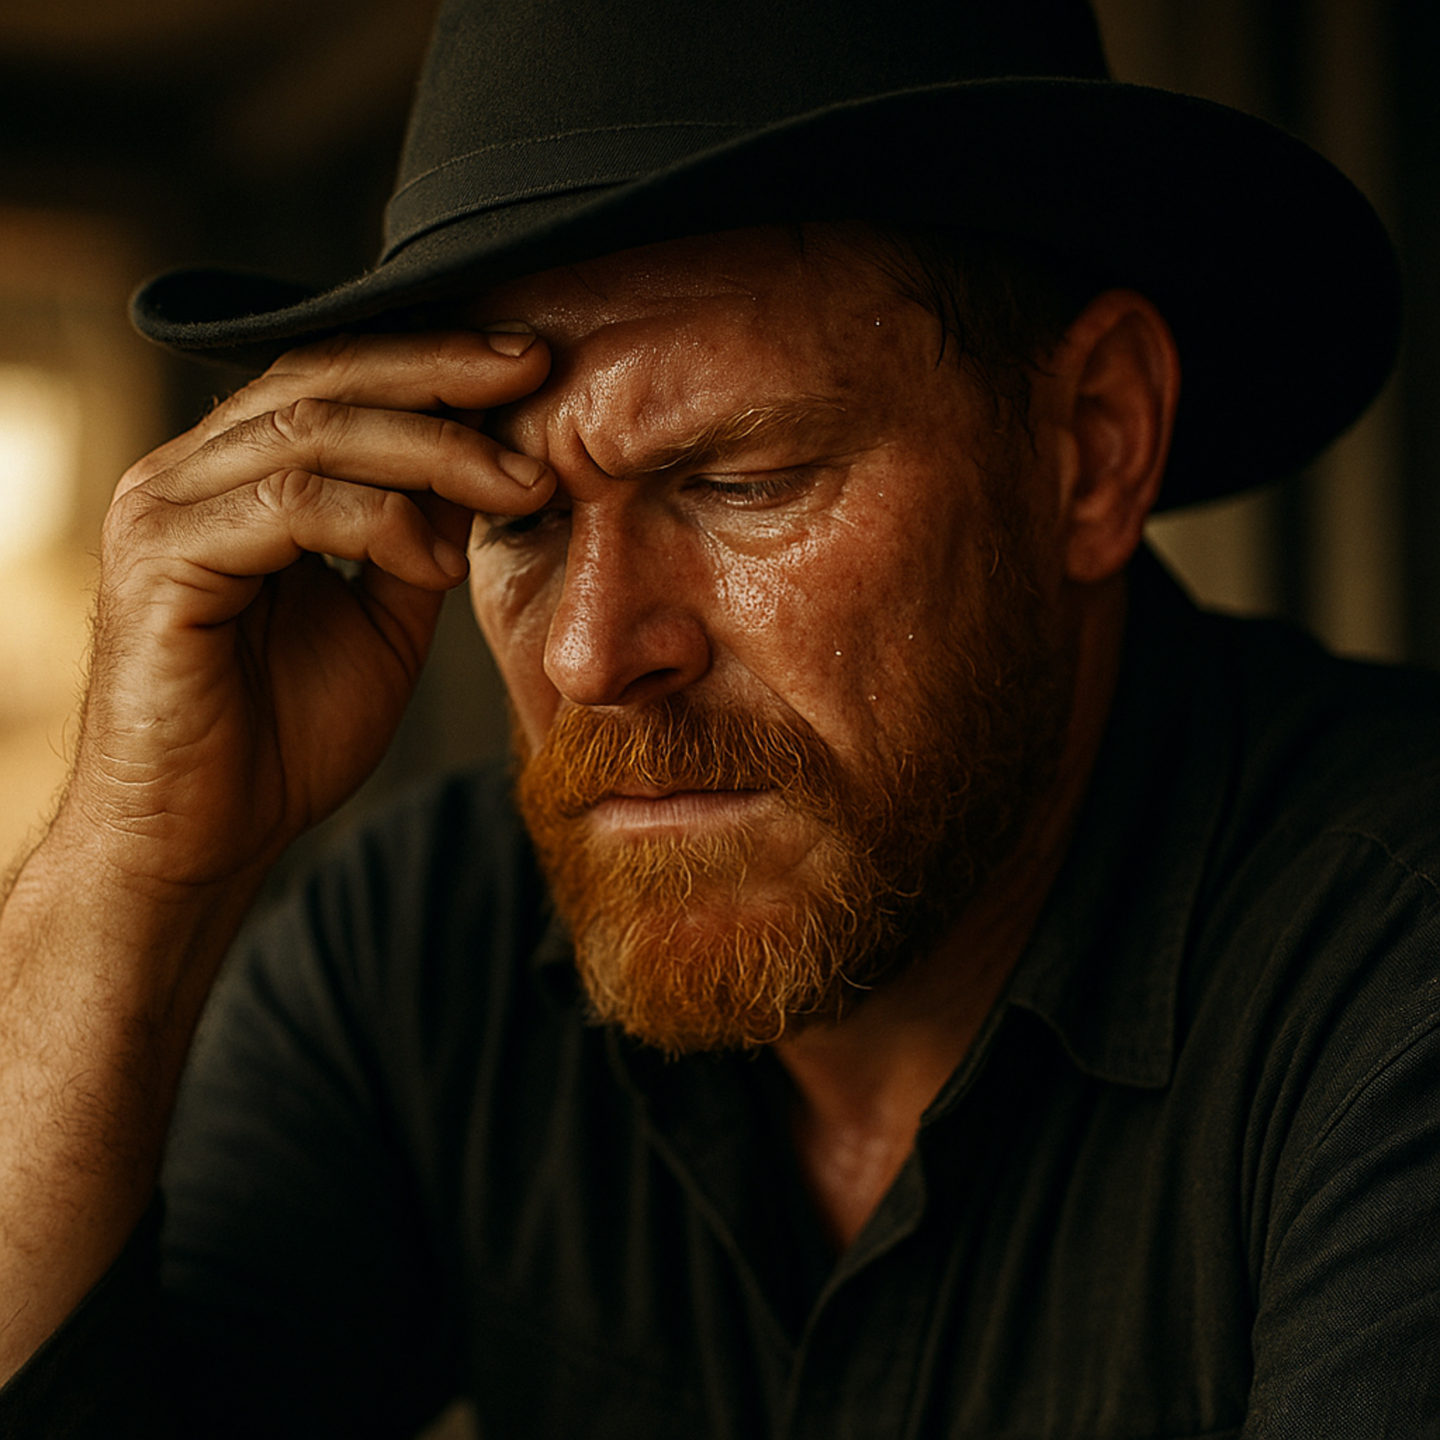
4. Detail / Close-up Shot

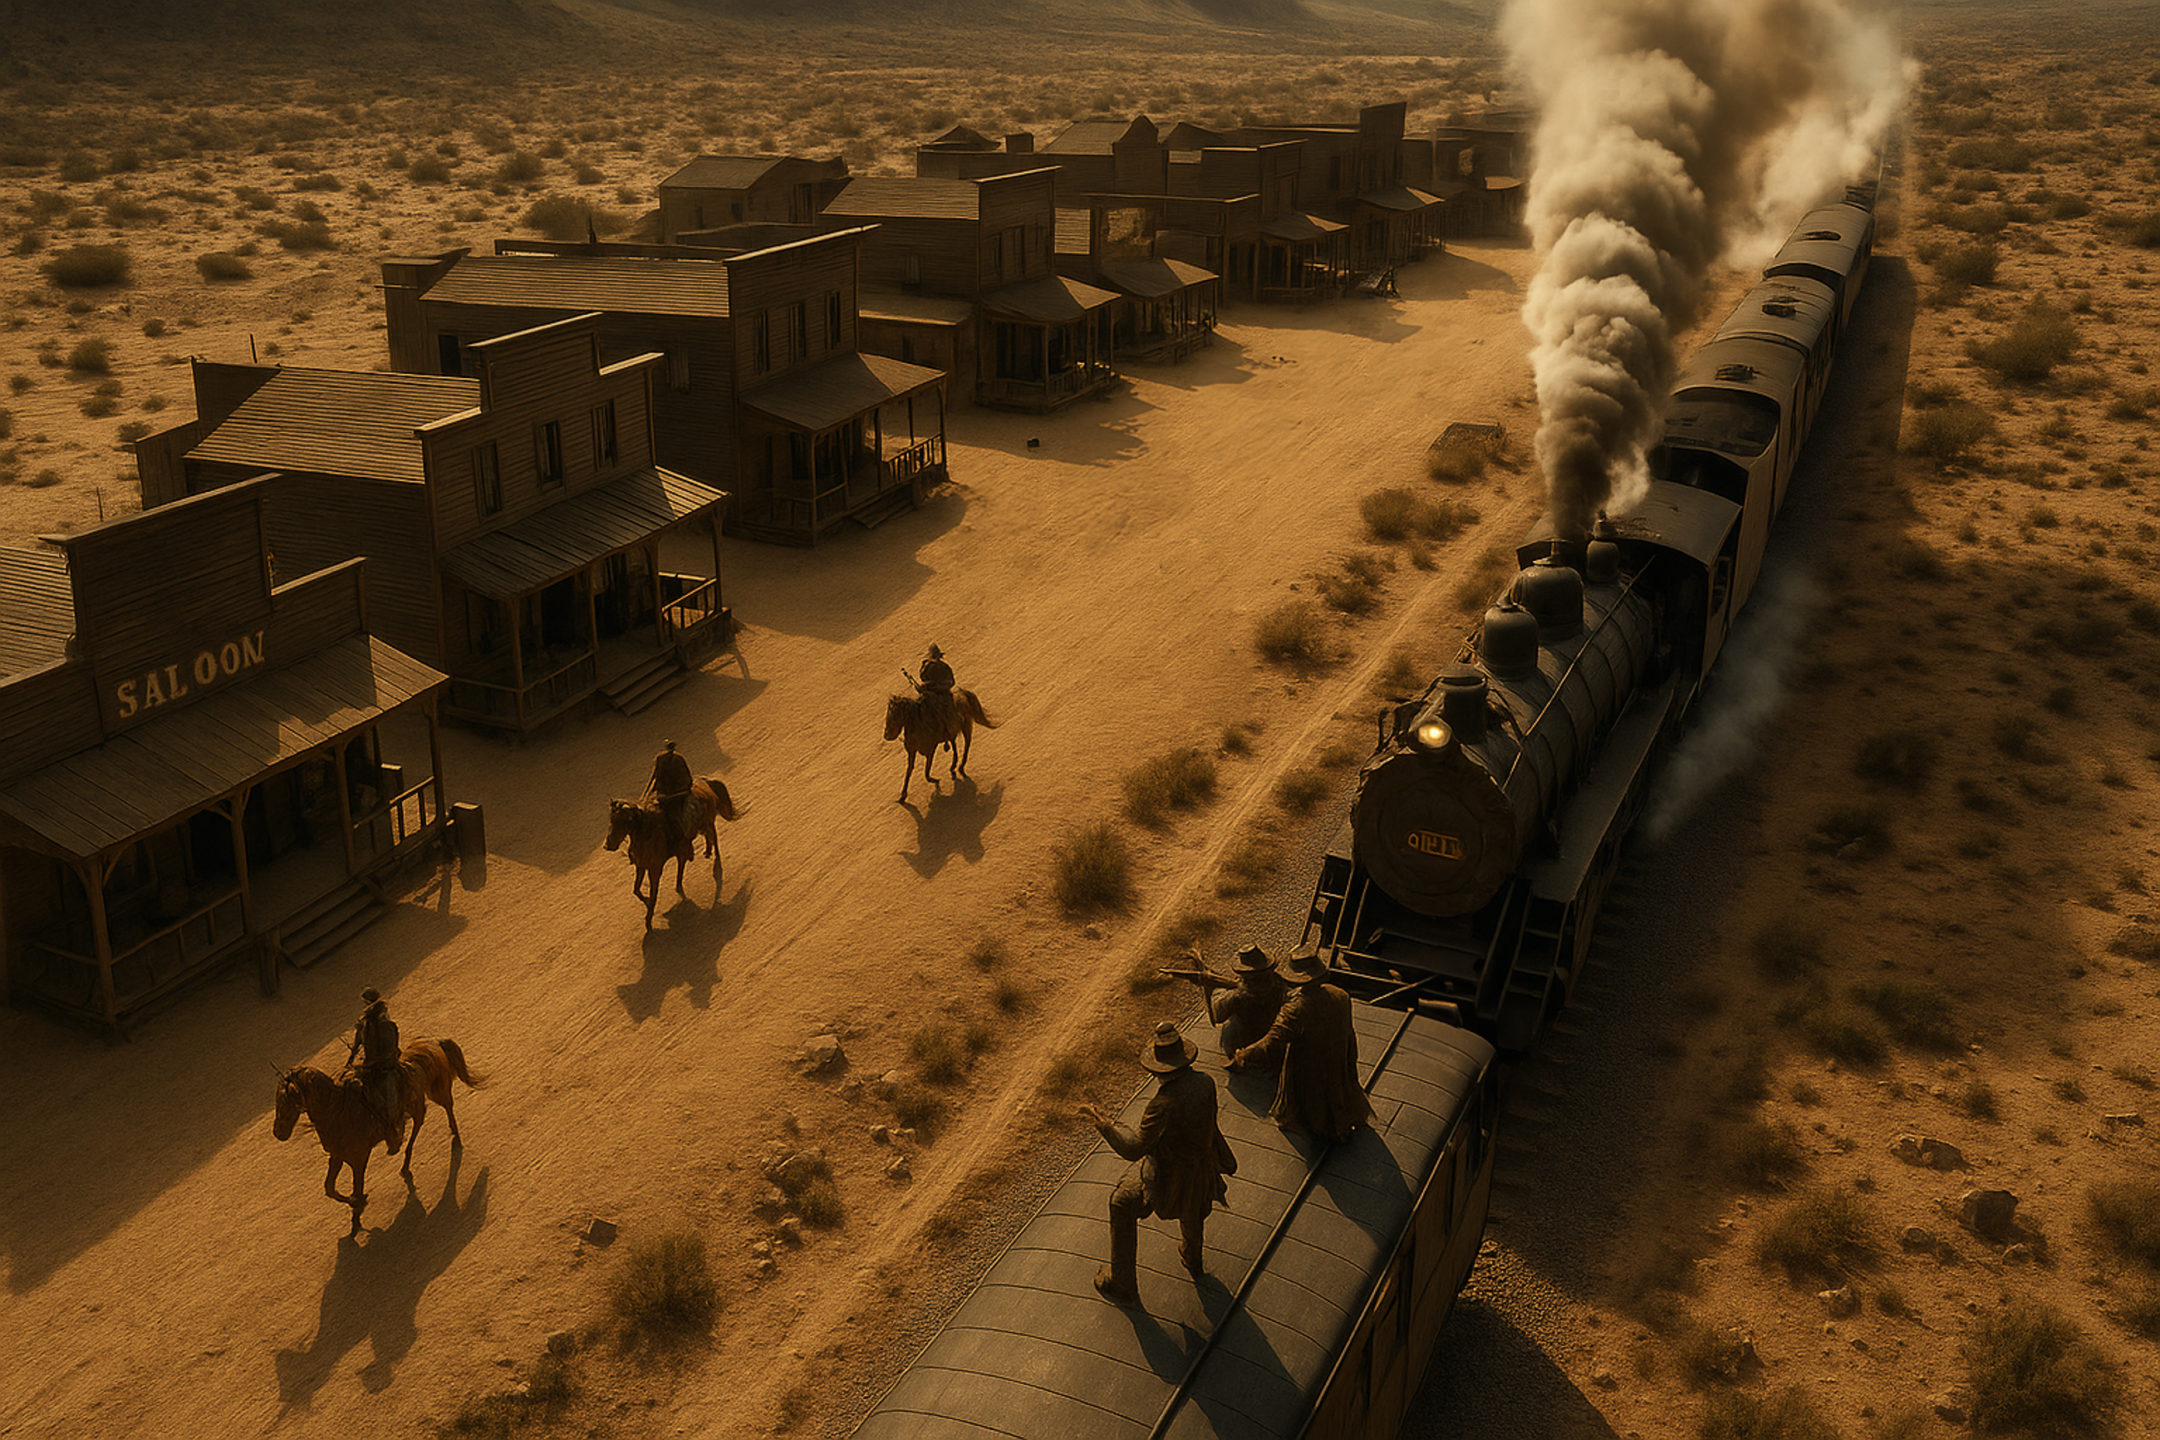
5. The Action Shot

***
📢 Using AI to Enhance Your Photography | Bonus Pro Classes!
As photographers, we’re not using AI to replace what we do — we’re using it to enhance our creative workflow. That’s why I’ll be hosting two exclusive Pro Classes on how to use AI tools for ideas, pre-visualisation, storyboarding, editing, composites, and more.
📅 If you’re a Pro Member, diarise these dates:
Thu, 12 June, 19:00
Thu, 26 June, 19:00
We’ll post the Zoom details in the Pro WhatsApp group by tomorrow!
🧠 If you’ve been sitting on the fence about becoming a Pro Member, now’s the time to jump in. Get access to sessions like these, 15% off all courses, and more.
👉 Join or upgrade here:
https://digitalphotographycourses.com/membership/
👇 We’d love to hear what you think! Do the visuals bring the framework to life? And where do you stand on using AI in photography — good thing or bad thing? Let us know in the comments!