
Backing Up Your Photos and Lightroom Catalogues
Protect your photos and Lightroom catalogues with these backup strategies
By Danie Bester
Every photographer—casual or serious—dreads the day they might lose their images. For casual snappers, it’s a lifetime of memories gone in a flash. For serious or professional photographers, losing photos or Lightroom catalogues can put you out of business. That’s why I make it a priority to hammer home the importance of backups in our 2-day Lightroom Classic Course.
This tutorial is tailored mostly for serious photographers—beginners or advanced—who’ve embraced Adobe’s ecosystem, particularly the Photographer Plan with Lightroom (Mobile Version) and the more powerful Lightroom Classic on their computers. You can read our article on what Adobe Plan to subscribe to here: https://digitalphotographycourses.com/why-you-should-embrace-adobe/
But even if you’re not using Lightroom, don’t worry—these principles can easily adapt to your workflow. I’ll walk you through various backup strategies, sharing my own tried-and-tested system to keep your precious work safe.
What We’ll Cover:
- Backing up smartphone photos with Lightroom Mobile
- Physical backups to hard drives (a weaker strategy)
- Cloud backups for photos and catalogues (my preferred approach)
- Hybrid backups: Combining physical and cloud backups
Let’s dive in, starting with the simplest part of the puzzle—your smartphone photos.
Backing Up Smartphone Photos with Lightroom Mobile
Let’s kick off with something straightforward: using Lightroom—which in my opinion, should have been called Lightroom (LR) Mobile—to back up photos from your phone. Unlike Lightroom Classic, it’s not as powerful, but it’s massively convenient. One key advantage? All your images are stored in Adobe’s Creative Cloud, giving you peace of mind and easy access across devices.
Let’s kick off with something straightforward: using Lightroom—which in my opinion, should have been called Lightroom (LR) Mobile—to back up photos from your phone. Unlike Lightroom Classic, it’s not as powerful, but it’s massively convenient. One key advantage? All your images are stored in Adobe’s Creative Cloud, giving you peace of mind and easy access across devices.
Another massive advantage? I’ve got Lightroom on my tablet and desktop too, so I can edit on bigger screens. Bigger is better—editing on a large display is far more accurate, especially for detailed tweaks, ensuring my images look spot-on across all platforms.
How I Organise and Edit Smartphone Photos
I love how Lightroom Mobile streamlines my workflow by letting me organise and polish my smartphone photos with ease. Here’s my step-by-step process to keep everything tidy and looking sharp:
- Just opening the Lightroom app, automatically imports all the images in my phone’s photo gallery.
- I quickly review them and ditch the rubbish ones.
- I sort the keepers into albums (e.g., Family Trips, Personal Projects).
- I apply my go-to presets for consistent colour and tone.
- I tweak as needed—cropping, adjusting exposure, or retouching.
- I share albums via web links or sync with Lightroom Classic for deeper edits and archiving.
Setting Up Automatic Import Images from my Phone’s Image Gallery (iOS & Android)
Setting up Lightroom Mobile to automatically import photos from my phone is a game-changer for keeping my images safe and organised. Here’s how I do it, with a couple of handy tips to ensure it works smoothly:
- Open the LR Mobile app → Tap the three dots (…) in the top-right.
- Go to App Settings → Import.
- Enable Photos, Screenshots, and Videos if you want those too.
- Enable HDR edit mode for new photos.
- Every time you open the app, it’ll import your images to the Lightroom Cloud.
- Once synced, delete them from your phone’s gallery to free up space. To be sure it’s working, periodically check that all your photos have synced successfully—spotty internet can trip things up. Also, keep your Adobe subscription active; without it, you can’t access your cloud-stored pics. Nice having everything in one place!

Important Note on Cancelling your Adobe Subscription
Importing my images from my iPhone or Android device means they’re backed up and now part of the Adobe ecosystem—ready for me to edit, share, or sync wherever I need them! However, cancelling your Adobe subscription comes with risks:
- No Editing Access: Once your subscription ends, you lose access to Lightroom’s editing tools, and edits to local photos won’t be viewable unless previously exported.
- Cloud Photos at Risk: Photos in Adobe’s Creative Cloud are kept for about 90 days post-cancellation, after which they may be deleted. You can briefly view and export unedited versions but editing and syncing stop.
Backup Advice: To protect your edited photos, export them from Lightroom Mobile to your device or another cloud service (like Google Drive or Dropbox) before cancelling.
Backing Up Photos and Lightroom Classic Catalogues
Now that your smartphone photos are safe, let’s tackle the bigger beast: backing up your photos and Lightroom Classic catalogue. If you use Lightroom Classic, you’ve probably noticed it nags you every week or so to make a backup. Brilliant, right? Except many inexperienced photographers assume this backs up their photos too—and that it’s stored in the cloud. Big mistake! Lightroom Classic backups are local, saved on your computer’s hard drive, and they don’t include your actual photos. If your hard drive crashes, your laptop gets nicked, or your house goes up in flames, you could lose everything—your catalogue (with all your edits) and your photos. Losing your catalogue might not sting too badly if you’re willing to start over, but losing your photos? That’s catastrophic—especially for pros who’d lose portfolios, client work, and irreplaceable assets.
Key Notes:
Lightroom Classic catalogues don’t hold your actual photos and backing them up doesn’t save your images.
You need to back up both:
- Your Lightroom Classic catalogue
- Your image files (RAW, JPEG, TIFF, PSD, etc.)
I need to hammer this home: Lightroom Classic is a database of your pictures. When you edit a photo in Lightroom, you’re tweaking a preview or proxy file—not the original. The original sits safely in a folder somewhere on your hard drive, and all the changes you make in Lightroom are just applied to its metadata. This is what we call non-destructive editing, and it’s brilliant because it keeps your originals untouched. But here’s the catch: since Lightroom Classic doesn’t “hold” your actual photos, backing it up doesn’t save the images themselves. That said, backing up your catalogue is still crucial—it stores all your edits, collections, and hard work.
Pro Tip: Avoid keeping your Lightroom Classic catalogue in the same folder as your photos. I prefer to keep mine on a separate, fast SSD for better performance, while my photos are stored on larger, standard hard drives. This setup not only makes Lightroom run smoother but also adds an extra layer of protection. If something goes wrong with your photo drive, your catalogue stays safe on its own drive—and vice versa. That way, if one drive fails, you’re not scrambling to restore both your catalogue and your photos from scratch. It’s a lot easier to recover just one drive, instead of both.
So, how do we keep it all safe? I’ll share two strategies—physical backups and cloud backups—starting with the weaker option, then moving to my preferred method.
Backing up Photos and Lightroom Catalogues
Physical backups involve copying your Lightroom catalogues and photo files to external hard drives, NAS devices, or tools like Apple’s Time Machine. While cloud backups are generally more convenient and reliable, if you travel to locations with no or weak internet, you have no choice but to make physical backups. In those cases, you can’t rely on cloud services to back up your photos in real-time, making physical backups essential to keep your work safe. It’s a decent start, but it’s got flaws I’ve learned the hard way. I once knew a photographer who kept his backup drive in his laptop bag while travelling—both got stolen, and he lost everything. Another mate (made-up story) stored his backups off-site and saved his career when his studio flooded. The lesson? Location matters.
Why It’s Weak
Physical backups might’ve made sense years ago, but with fast internet now common, cloud storage so accessible, and the many points of failure physical drives bring—like theft or hardware crashes—they’re just not the best option anymore.
- It’s a tedious task—you’ve got to set reminders to physically connect your drives or devices.
- Setting up backup software can be daunting if tech isn’t your strong suit.
- For redundancy, you must keep backups off-site—fires, floods, or hurricanes don’t care about your hard work.
- On photo trips, don’t stash backups in your laptop bag—use a lodge safe or a mate’s luggage instead.
- Hard drives fail over time; replace them every 3-5 years to avoid heartbreak.
- Test your backups by restoring files occasionally—don’t assume they’re good until it’s too late.
- Label and date drives clearly; a jumble of unnamed drives is a nightmare.
- Use high-quality, reputable hard drives—cheap ones can fail when you need them most.
- Disconnect your backup drive after each session to shield it from viruses or power surges hitting your main system.
- Consider multiple off-site locations (e.g., a friend’s house or a bank safe) for extra security.
Key Steps to Physical Backups
Making physical backups work means covering all your bases—your catalogue and photos both need proper attention to stay safe. Here’s what you need to do:
- Back up both:
- Your Lightroom Classic catalogue
- Your photo folders
- Finally, use reliable, shock-resistant external drives (look for ones built to handle drops or jolts), disconnect them after each backup to avoid accidental damage, and store at least one copy off-site to protect against disasters.
Recommended Physical Backup Software
If you’re sticking with physical backups, the right software can make all the difference—I’ve used Acronis True Image in the past and was impressed with how reliable and straightforward it was. Here’s my ranked list of top options to help you get it done:
- Acronis True Image (Windows/Mac): Full system imaging and file backups with cloud options. I used this back in the day and loved its reliability. Subscription or one-time purchase. https://www.acronis.com
- EaseUS Todo Backup (Windows/Mac): Simple full backups, disk cloning, and scheduling. Affordable and easy for beginners. Subscription-based. https://www.easeus.com/backup-software/
- Time Machine (Mac only): Built-in, automatic backups with versioning. Free and seamless for Mac users.
- AOMEI Backupper (Windows): System, disk, and file backups with incremental options. Free with paid upgrades for extras. https://www.ubackup.com
- Carbon Copy Cloner (Mac only): Disk cloning and scheduling with a user-friendly interface. One-time purchase, worth it for Mac fans. https://bombich.com
Physical backups work, but they’re clunky and risky if not managed well. That’s why I’ve shifted to cloud backups—a smoother, safer bet that builds on the cloud convenience we’ve already seen with LR Mobile. Let’s explore that next.
Cloud Backups for Photos and Lightroom Catalogues (My Preferred Strategy)
I initially started with physical backups but eventually settled on a hybrid cloud system that’s proven its worth time and again. Back in the day, I relied on a NAS device with four hard drives set up in a RAID 5 configuration. It worked well enough, but it was a hassle to configure, demanded heaps of time to manage backups, and—let’s be honest—was way too pricey for what it offered. Now, I’ve switched to a slicker, two-pronged approach:
- I back up my Lightroom Classic catalogue to OneDrive,
- And my photos and computer data to Backblaze.
This setup gives me a unified, worry-free approach. Here’s how it works, step by step:
Step 1: Backing Up Your Lightroom Classic Catalogue to a Cloud Service
Backblaze (which I’ll get to) doesn’t support database files like Lightroom catalogues, so I use a cloud storage service—OneDrive in my case. For this tutorial, I assume you’re using one catalogue (I explain why that’s best in my Lightroom Classic Course). Most of us already have some cloud service through subscriptions like Office 365, so it’s often free to tap into.

A. Set Up Backup Frequency
- By default, Lightroom Classic asks to back up when you exit. If you’ve turned it off or want to adjust it:
- Windows: Edit > Catalogue Settings > Backup
- Mac: Lightroom > Catalogue Settings > Backup
You can set it to daily, weekly, or next exit. I do weekly backups, but after a big job, I trigger it straight away to lock in my edits.
B. Set Up Backup Location
- In the Back Up dialogue, pick a folder. I’ve created a backup folder in my OneDrive.
- If you use iCloud, Dropbox, or Google Drive, point it there instead. Whatever makes most sense for you!
C. Maintaining and Checking Your Backups
- Check periodically that your cloud service is syncing—there’s no point in backups if they’re stuck on your computer. I’ve been caught out by a dodgy sync before and lost a whole week of edits!
- Lightroom keeps stacking backups in your folder but won’t delete old ones automatically—a bit of a hassle, so you’ll need to delete the older ones yourself.
- I recommend setting a monthly reminder to review your cloud folder, ensure the full catalogue file has uploaded, and delete the older backups.
- Keep 2–3 recent backups in case one’s corrupted or you need an older version after a glitch.
- If your internet’s shaky, pause big edits until the catalogue syncs—don’t risk working off an outdated backup.
- Got multiple catalogues? Back each one up separately to avoid confusion
D. Restoring a Lightroom Catalogue
Picture this: your computer’s crashed, or you’ve accidentally deleted your catalogue—panic sets in, but don’t worry, because if you’ve followed my backup plan, you’re golden. Restoring your Lightroom Classic catalogue from the cloud is a straightforward lifeline to get you back in action fast. Here’s how to do it:
- Open Lightroom Classic → File > Open Catalogue.
- Head to your cloud folder (e.g., OneDrive). Download the latest .lrcat file if it’s not synced locally.
- Open it—Lightroom reloads your last saved state.
- If your photos are on a separate drive, connect it and relink any missing files (Lightroom will nudge you).
- Test it—check a few collections or edits to confirm it’s all there.
- Once you’re happy, copy the restored .lrcat file to your usual Lightroom folder so it’s back where it belongs for everyday use.
Popular Cloud Services
I lean on OneDrive simply because I’ve got an Office 365 subscription, but I wouldn’t mind using any of the other popular cloud services—here’s a rundown of the top options:
- iCloud (Mac-focused): Seamless for Apple users with 5GB free, £0.79/month for 50GB, up to £49.99/month for 12TB. Drag files into Finder’s iCloud Drive or upload via iCloud.com. https://www.icloud.com/
- OneDrive: Perfect for Windows/Office 365 users, 5GB free, £59.99/year for 1TB. Less slick on Mac but does the job. https://www.microsoft.com/en-us/microsoft-365/onedrive/online-cloud-storage
- Google Drive: Easy uploads, 15GB free, £7.99/month for 2TB. Great for simplicity across platforms. https://www.google.com/drive/
- Dropbox: Intuitive drag-and-drop, 2GB free, with versioning. https://www.dropbox.com/
With your catalogue safe in the cloud, let’s shift to securing your photos—where a dedicated online backup service takes centre stage.
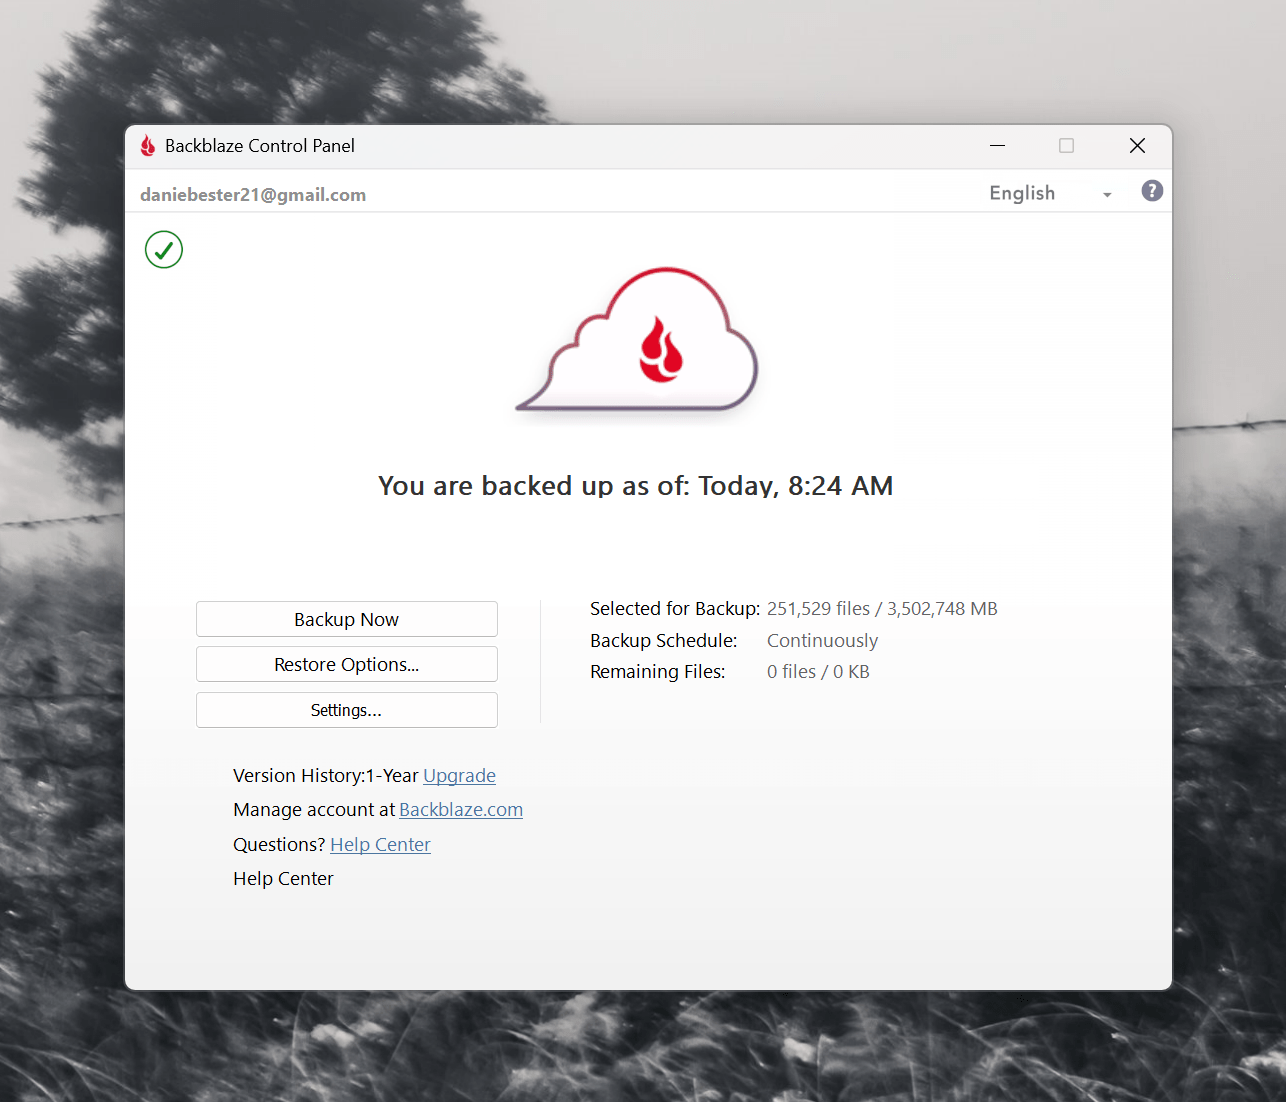
Step 2: Backing Up Your Photos with Backblaze
My photo drives are too massive for OneDrive or similar, so I use Backblaze (https://www.backblaze.com/) for my images and computer data. It’s designed for big data, offering unlimited storage—no caps to stress over. At around £66 a year (roughly R1,300 in South Africa), it’s a steal compared to a NAS with RAID 5, which can run into tens of thousands.
After I installed Backblaze, my initial 7TB backup took a month, but it hummed along in the background—I barely noticed. Now, daily reports confirm my new work is backed up, giving me total peace of mind. It’s got versioning, recovery options, encryption, and two-factor authentication—security sorted.
Online Backup Tips and Testing
Once you’ve got Backblaze running, a few practical habits can ensure your backups are bulletproof and suit your needs. Here’s how to make the most of it and avoid any nasty surprises:
- Backblaze can’t handle databases, including Lightroom catalogues—stick to a cloud service like OneDrive for those.
- You can exclude drives or folders you don’t need, but if unsure, back up everything—it’s free and just takes time.
- New computer? Use Inherit Backup State to pick up your old backup—no starting over!
- Check the Backblaze panel regularly to confirm files are uploaded, and test restores now and then. If privacy’s a worry (Backblaze is US-based), explore other providers.
- Track costs to stay within budget—Backblaze is cheap, but it’s good to know what you’re spending.
Not tech-savvy? Get an expert to set it up and check it for you periodically—don’t gamble with your memories or livelihood.

Hybrid Backups: A SECOND LAYER OF PROTECTION
I’ve been thrilled with how Backblaze has worked for me. It effortlessly recovered accidentally deleted photos, saving me from potential disaster, and when I recently upgraded my PC, the Inherit Backup State feature made the transition seamless—everything picked up right where I left off. For most photographers, this cloud-only solution is a straightforward and reliable choice. But if you’re handling hundreds or thousands of images weekly and facing tight client deadlines, relying solely on the cloud can feel risky. Backblaze offers a handy extra: for an additional fee, they’ll send your files on a disk via courier if things go wrong. Living in South Africa, though, with Backblaze based in the US, that delivery might take too long to arrive—sometimes days or weeks when you need files now. That’s where a hybrid system steps in—and trust me, it’s hands-down the safest way to go.
So, if you’re someone who shoots a lot and worries that online recovery—or even the courier option—might be too slow, a hybrid approach could be worth considering. This involves pairing a cloud backup like Backblaze with a local backup, such as an external hard drive or a NAS like Synology www.synology.com—big in Europe for its GDPR-friendly local storage—or QNAP www.qnap.com, , a top choice in the US. It’s perfect for those massive shoots when you can’t afford downtime, though it does require extra setup and maintenance. Plus, there’s a bonus: if a solar flare ever hits the US and takes out Backblaze’s servers, you’ll be glad for that local copy—assuming the flare didn’t turn your hard drive or NAS device into a cosmic paperweight too! I can’t stress this enough: hybrid backups are definitely your safest bet, giving you that unbeatable combo of cloud security and local reliability.
For me personally, Backblaze and OneDrive alone hit the sweet spot of simplicity and security. The cloud-only setup keeps things effortless, and it’s met my needs perfectly so far. But for photographers with different demands—like bigger workloads or faster turnaround times—the hybrid strategy offers the ideal balance of speed and peace of mind, and it’s absolutely the most secure option out there.
DPC Pro Member Backup Initiative
To make this even easier, we’ve launched an initiative at DPC to personally help our Pro members setting up their backup systems. Whether it’s hands-on setup or expert advice, check the Pro WhatsApp group for details—we’re here to support you. This is just one way we’re helping our community stay secure, but there are some universal tips every photographer can use to nail their backup game.
Click here to become a Pro Member: https://digitalphotographycourses.com/membership/
Lightroom Classic Course
Backing up your photos and Lightroom catalogues doesn’t have to be a headache—it’s about finding a system that works for you, like my cloud combo of LR Mobile, OneDrive, and Backblaze. Want to master this and more? Book our 2-day Lightroom Classic Course, packed with sample catalogues, free presets, and nearly 40 hours of video tutorials to make Lightroom work for you. Details here: https://digitalphotographycourses.co.za/lightroom-courses/
YOUR THOUGHTS?
There you have it—my battle-tested backup system to keep your photos and Lightroom catalogues safe, from smartphone snaps to pro-level archives. What did you think of this guide? Got any questions, or are you using a different backup strategy that’s working wonders for you? Pop it in the comments below—I’d love to hear your take and chat more about keeping our work secure!